Post by: Afdarenty on June 01, 2016, 02:18:06 pm
Phase 1 Voting - Writing Tasks
Links to the other Phase 1 Voting threads:
10th Trials - Phase 1 Voting: Deckbuilding (http://elementscommunity.org/forum/trials/10th-trials-phase-1-voting-deckbuilding/)
10th Trials - Phase 1 Voting: Card Design (http://elementscommunity.org/forum/trials/10th-trials-phase-1-voting-card-design/)
10th Trials - Phase 1 Voting: Miscellaneous (http://elementscommunity.org/forum/trials/10th-trials-phase-1-voting-miscellaneous/)
This is your chance to choose your favourite Phase 1 Task submissions - the tasks with the most points will earn bonus points. You can submit 1 vote for each category of Phase 1 tasks, which are:
- Deckbuilding
- The Trials #2 Task, Waging War against the False Gods
- The Trials #5 Task, Aiding your Allies
- Writing
- The Trials #1 Task, Mastering the Cards
- The Trials #9 Task, Being a War Reporter
- Card Design
- The Trials #3 Task, Improving the Future
- The Trials #4 Task, Shard Revolution
- Miscellaneous
- The Trials #6 Task, Building the Game
- The Trials #8 Task, Starting your own Little War
Anyone who registered their accounts before the posting of the 10th Trials - Rules (http://elementscommunity.org/forum/trials/10th-trials-rules/) is eligible to vote. To vote, simply rank the submissions below, starting with 1 as best. You don't have to rank all the submissions, just rank the ones you think were good. Please be sure to include the username and task name while voting. Votes will be counted by the alternate voting system. (Here's a nifty video explaining it (https://www.youtube.com/watch?v=3Y3jE3B8HsE))
e.g. if the 5 submission for Task X were by Wyrm, Pegasus, Psion, Gargoyle and Lycanthrope:
1 - Wyrm - Task X
2 - Pegasus - Task X
3 - Psion - Task X
4 - Gargoyle - Task X
5 - Lycanthrope - Task X
This is a valid vote.
1 - Wyrm - Task X
2 - Pegasus - Task X
3 - Psion - Task X
This is valid. You can rank all the ones you thought were decent and just ignore the rest.
1 - Wyrm - Task X
4 - Pegasus - Task X
2 - Psion - Task X
3 - Gargoyle - Task X
This is valid; but please ensure that the ranks are in order so that we can easily count votes.
1 - Wyrm - Task X
2 - Pegasus - Task X
2 - Psion - Task X
This is invalid. Please don't tie votes.
3 - Wyrm - Task X
2 - Pegasus - Task X
4 - Psion - Task X
This is invalid, since there's no vote for 1st place. Please start voting at 1 and go up.
1 - Wyrm - Task X
2 - Pegasus - Task X
3 - Psion - Task X
4 - Gargoyle - Task X
5 - Lycanthrope - Task X
This is a valid vote.
1 - Wyrm - Task X
2 - Pegasus - Task X
3 - Psion - Task X
This is valid. You can rank all the ones you thought were decent and just ignore the rest.
1 - Wyrm - Task X
4 - Pegasus - Task X
2 - Psion - Task X
3 - Gargoyle - Task X
This is valid; but please ensure that the ranks are in order so that we can easily count votes.
1 - Wyrm - Task X
2 - Pegasus - Task X
2 - Psion - Task X
This is invalid. Please don't tie votes.
3 - Wyrm - Task X
2 - Pegasus - Task X
4 - Psion - Task X
This is invalid, since there's no vote for 1st place. Please start voting at 1 and go up.
Please send your votes for the writing category by sending a forum PM to Zawadx, Physsion and Afdarenty with the title "Phase 1 Vote - Writing".
Phase 1 voting will end in:
Phase 1 voting has ended!
Phase 1 voting has ended!
Post by: Afdarenty on June 01, 2016, 02:18:29 pm
From Trials #1:
Mastering the Cards
Fractal
Fractal anything is viable? Right? Well it is, but there are some conditions. Fractal is a decent/justifiable card when cast on any creature, but decent/justifiable isn't enough to be the core of a competitive deck. For that, fractal has to be used on a creature which makes its effect worthwhile. These typically fall into four classes:
For now, I'm just gonna discuss Fractal Rush Creatures.
Combining fractal with 0-2 cost creatures can allow you to just unload an army of hitters the same turn as you fractal. With a stable quanta base, these creatures are usually out of your hand by the turn after you fractal. Since this strategy allows you to play 8 copies of a creature using just two cards within the first 4-6 turns, you really want to leverage the damage and be able to set your opponent up for the kill. So having at least 4 attack, as 8 4 attack creatures are enough to kill in three turns with 4 extra damage done beforehand.
Unupped, no creature can fit the criteria to make a Fractal rush. Horned frog comes close, but 3 attack is much slower than 4 attack (needs one more turn at least, and playing just one of the creatures beforehand isn't enough to ensure the required damage). Upped however, several creatures fit:
Minor Phoenix: 4 attack is a decent sweet spot, and it is in-element with deflagration so shields pose no threat. The CC resistance is just icing on the cake. Don't expect these guys to counter mass cc like Thunderstorm or Rain of Fire however; the one turn of damage lost and :fire spent reviving them is usually too much to recover from.
Graviton Guard: 4|7 is pretty much perfect for 2 mana, as this just ignores all cc and goes on hitting. Gravity does not have the best support for it however, though Chimaera can be an out for shield bypass (or a Panic button if needed), Titan can augment the rush and Chargers act as another brand of fractal target (more on that later)
Giant Frog: 5 attack for 2 cost? Wow! Except, 5 attack is usually not to be faster than 4 attack. If you have 8 of these post fractal, you still need 3 turns for the kill. It does give some leeway vs shields however, which is necessary since :life does provide any form of pc or shield bypass… or any support really. However they are decent hitters played alone, and so can often take the game with sheer power.
Ball Lightning: 5 attack for 0 cost? Amazing! Except it just dies at the end of the turn, so you need multiple fractals to actually get the win. Which requires you to draw better, the bane of a rush deck.
Spark (and Phase Salvager)
Spark has unique position of providing the best damage-to-cost ratio for any creature in the game. However, its normal effect is not a creature but rather a damage spell that only hits the opponent and is affected by shields. Which is… not a good thing. To make up however, Spark has some of the strongest combo potential for such a vanilla card. It is honestly an amazingly designed card , with such a simple aesthetic and mechanic but so many combos.
SoPa + Aflatoxin: This is mostly a grinder combo, since it's very slow in PvP. But spark provides the best malignant cell generator with SoPa, since you can play it after you've played SoP and still get the malignant cell. SoPa alone also makes the spark an amazing hitter, but it has very low HP and is too slow to grow without any inherent defense.
Fractal + Sky Blitz: While just fractal on Sparks is usually not enough to finish the game, Sky Blitz can function as a better second fractal. And using a pend base, you can get it out faster! Throw in some damsels for a wicked fun deck.
Immolation: Spark functions as great damage to add to an immo deck, and is the perfect imo fodder at 0 cost. Immo+Spark forms the foundation of some of the fastest PvP and grinder decks around.
What about Phase Salvager? Yeah it has an interesting mechanic, but costing quanta makes it pretty useless :/
Silence
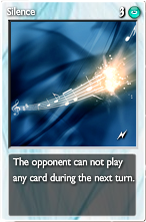
Silence is a card that's often thought of playable. In reality, it fills a very special niche: ensuring you can push damage without opponent interfering with pesky cards. It's denial effect is the most potent in the game, but the trade of 1 card for 1 turn does make it pretty weak. So you must build your deck to maximize the value of Silence, and for that synergy is a must.
Parallel Universe/Fractal offer in-element synergy with Silence due to their bursty nature. If your opponent is a domin, silence can easily ensure your field survives the turn. If you want to stick silence in a burst deck, however, be sure to optimize it so that the job can be done in as few silences as possible.
Nightmare is an amazing card for any dark domin. One of its main perks is that it puts the opponent at 8 cards during his draw phase, preventing a draw from the opponent. Silencing during that time lets you stop the draw for two turns straight! While the combo is a bit inconsistent, it can be very strong vs decks which rely on drawing its own combos.
Denial cards such as Devourer and Discord can be utilized alongside Silence to have denial for a longer duration. Just as the quanta is stabilizing for the opponent, you can silence him to stop him for further turns. This is not very strong though, so your deck should include a bursty PU/fractal wincon to make the silences worthwhile.
Mastering the Cards
Fractal
Fractal anything is viable? Right? Well it is, but there are some conditions. Fractal is a decent/justifiable card when cast on any creature, but decent/justifiable isn't enough to be the core of a competitive deck. For that, fractal has to be used on a creature which makes its effect worthwhile. These typically fall into four classes:
For now, I'm just gonna discuss Fractal Rush Creatures.
Combining fractal with 0-2 cost creatures can allow you to just unload an army of hitters the same turn as you fractal. With a stable quanta base, these creatures are usually out of your hand by the turn after you fractal. Since this strategy allows you to play 8 copies of a creature using just two cards within the first 4-6 turns, you really want to leverage the damage and be able to set your opponent up for the kill. So having at least 4 attack, as 8 4 attack creatures are enough to kill in three turns with 4 extra damage done beforehand.
Unupped, no creature can fit the criteria to make a Fractal rush. Horned frog comes close, but 3 attack is much slower than 4 attack (needs one more turn at least, and playing just one of the creatures beforehand isn't enough to ensure the required damage). Upped however, several creatures fit:
Minor Phoenix: 4 attack is a decent sweet spot, and it is in-element with deflagration so shields pose no threat. The CC resistance is just icing on the cake. Don't expect these guys to counter mass cc like Thunderstorm or Rain of Fire however; the one turn of damage lost and :fire spent reviving them is usually too much to recover from.
Graviton Guard: 4|7 is pretty much perfect for 2 mana, as this just ignores all cc and goes on hitting. Gravity does not have the best support for it however, though Chimaera can be an out for shield bypass (or a Panic button if needed), Titan can augment the rush and Chargers act as another brand of fractal target (more on that later)
Giant Frog: 5 attack for 2 cost? Wow! Except, 5 attack is usually not to be faster than 4 attack. If you have 8 of these post fractal, you still need 3 turns for the kill. It does give some leeway vs shields however, which is necessary since :life does provide any form of pc or shield bypass… or any support really. However they are decent hitters played alone, and so can often take the game with sheer power.
Ball Lightning: 5 attack for 0 cost? Amazing! Except it just dies at the end of the turn, so you need multiple fractals to actually get the win. Which requires you to draw better, the bane of a rush deck.
Spark (and Phase Salvager)
Spark has unique position of providing the best damage-to-cost ratio for any creature in the game. However, its normal effect is not a creature but rather a damage spell that only hits the opponent and is affected by shields. Which is… not a good thing. To make up however, Spark has some of the strongest combo potential for such a vanilla card. It is honestly an amazingly designed card , with such a simple aesthetic and mechanic but so many combos.
SoPa + Aflatoxin: This is mostly a grinder combo, since it's very slow in PvP. But spark provides the best malignant cell generator with SoPa, since you can play it after you've played SoP and still get the malignant cell. SoPa alone also makes the spark an amazing hitter, but it has very low HP and is too slow to grow without any inherent defense.
Fractal + Sky Blitz: While just fractal on Sparks is usually not enough to finish the game, Sky Blitz can function as a better second fractal. And using a pend base, you can get it out faster! Throw in some damsels for a wicked fun deck.
Immolation: Spark functions as great damage to add to an immo deck, and is the perfect imo fodder at 0 cost. Immo+Spark forms the foundation of some of the fastest PvP and grinder decks around.
What about Phase Salvager? Yeah it has an interesting mechanic, but costing quanta makes it pretty useless :/
Silence
Silence is a card that's often thought of playable. In reality, it fills a very special niche: ensuring you can push damage without opponent interfering with pesky cards. It's denial effect is the most potent in the game, but the trade of 1 card for 1 turn does make it pretty weak. So you must build your deck to maximize the value of Silence, and for that synergy is a must.
Parallel Universe/Fractal offer in-element synergy with Silence due to their bursty nature. If your opponent is a domin, silence can easily ensure your field survives the turn. If you want to stick silence in a burst deck, however, be sure to optimize it so that the job can be done in as few silences as possible.
Nightmare is an amazing card for any dark domin. One of its main perks is that it puts the opponent at 8 cards during his draw phase, preventing a draw from the opponent. Silencing during that time lets you stop the draw for two turns straight! While the combo is a bit inconsistent, it can be very strong vs decks which rely on drawing its own combos.
Denial cards such as Devourer and Discord can be utilized alongside Silence to have denial for a longer duration. Just as the quanta is stabilizing for the opponent, you can silence him to stop him for further turns. This is not very strong though, so your deck should include a bursty PU/fractal wincon to make the silences worthwhile.
From Trials 1: Mastering the Cards
Fractal- Fractal is an interesting card that has many uses. Some decks it can be used in are ones that use low level creatures as the base. Get one out then play Fractal to then spam your field with the tiny devils! Another way to use Fractal is to build up your quanta for bigger creature (such as dragons) and then playing the Fractal on one of them to get out a few more big hitters for massive damage in just a few turns. There are a few cards in particular that Fractal goes great with. One such card is Ray of Light. Fractaling a 0 drop that produces light is a scary thought, especially if you are packing Hopes in your deck. Another small creature that Fractal goes well with is Devourer/Pest. Pest ( I will use pest for the sake of typing) by itself is an annoying card that is good for control. The more Pests you have the less quanta your foe has. One last creature that Fractal works well with is another Aether card, Psion. Spell damage can only be stopped by two shields, and what if your foe is not packing those shields? Then you can use fractal to amass your Psion army that can’t be stopped. The best way to utilize Fractal is to have one or two creatures that you are going to make copies of. For the best result they should be from the same element if you want more than one. ALWAYS keep at least one of whatever creature in your hand just incase for whatever reason you lose all the rest. Focus on generating the quanta of the creature(s) you wish to fractal, only because getting 10 of any quanta is easier than getting around 30ish to play many creatures on the same turn.
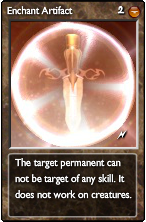
Dimensional Shield- The Dim Shield is fun little guy that is loved by hundreds and hated by thousands. For 6 (or 5) it protects you from almost all sources of damage for 3 turns. Because of this, some FG decks use it to buy time for the end game. Any card that takes some time to play (i.e. getting the quanta to play it) is helped by the Dim because the Dim buys time for you to get what you need. This is why most mono-Aether decks will pack a few. One card that goes really well with the Dim Shield is Fractal. In a mono-Aether deck, Fractal takes all the quanta you need, so that means you need some time to build back your quanta to play what you fractaled. A good example of this combo is in a Psiontal deck. Play a Dim to get a few turns to Fractal a Psion and play more the next few turns while you are protected. Another card that goes well with the Dim is Antimatter. Over the time that I have played Elements I have had some success with a Dim Shield/Antimatter stall. Sit behind your Dims and AM your foes strong creatures so when you can’t play a shield you are fine until you get another. Enchant Artifact is yet another card that goes well with the Dim Shield. This one is self explanatory, a shield that prevents almost all types of damage that you can’t destroy. Scary Stuff. The best way to utilize the Dim Shield is to just play them in succession. Wait until the shield has no turns left and play another one for 3 more turns of protection. Start the chain when you see that your foe is dealing massive damage. If you are only taking 5 damage and you start the chain, there is a chance you might run out before you can defeat your foe.
Parallel Universe- Do you like your 12 | 12 Skeleton? Then why not have two of them! That’s right folks, for just 7 Aether quanta you can create an exact copy of your favorite card! With this card you can set up many combos. One combo with Sky Blitz works wonders as a FG killer combo. Get a creature, buff it up, Sky Blitz to double the attack power then PU your new strong creature to have two to then in turn quadruple your original damage. Another card that is a fun friend of Parallel Universe is the Wyrm. Dive, PU, dive, PU, dive, PU. Scary combo to say the least. Doubling the attack to then copy which leads to that doubled attack being doubled, another great FG killer combo. Another card combo that works well with PU is Voodoo Doll. This combo is featured in the funny deck (that works) It’s a Trap. You buff the defence of your Voodoo Doll then PU it so you can have another doll to soak up all that damage. The best way to utilize the Parallel Universe is to get a creature that is a big hitter (or in the Voodoo Doll case a big defender) then PU it to make another one. If you want you can use it on a weaker creature although unless you can support the buffing of more than one creature, it is recommended that you buff a creature then PU it.
Fractal- Fractal is an interesting card that has many uses. Some decks it can be used in are ones that use low level creatures as the base. Get one out then play Fractal to then spam your field with the tiny devils! Another way to use Fractal is to build up your quanta for bigger creature (such as dragons) and then playing the Fractal on one of them to get out a few more big hitters for massive damage in just a few turns. There are a few cards in particular that Fractal goes great with. One such card is Ray of Light. Fractaling a 0 drop that produces light is a scary thought, especially if you are packing Hopes in your deck. Another small creature that Fractal goes well with is Devourer/Pest. Pest ( I will use pest for the sake of typing) by itself is an annoying card that is good for control. The more Pests you have the less quanta your foe has. One last creature that Fractal works well with is another Aether card, Psion. Spell damage can only be stopped by two shields, and what if your foe is not packing those shields? Then you can use fractal to amass your Psion army that can’t be stopped. The best way to utilize Fractal is to have one or two creatures that you are going to make copies of. For the best result they should be from the same element if you want more than one. ALWAYS keep at least one of whatever creature in your hand just incase for whatever reason you lose all the rest. Focus on generating the quanta of the creature(s) you wish to fractal, only because getting 10 of any quanta is easier than getting around 30ish to play many creatures on the same turn.
Dimensional Shield- The Dim Shield is fun little guy that is loved by hundreds and hated by thousands. For 6 (or 5) it protects you from almost all sources of damage for 3 turns. Because of this, some FG decks use it to buy time for the end game. Any card that takes some time to play (i.e. getting the quanta to play it) is helped by the Dim because the Dim buys time for you to get what you need. This is why most mono-Aether decks will pack a few. One card that goes really well with the Dim Shield is Fractal. In a mono-Aether deck, Fractal takes all the quanta you need, so that means you need some time to build back your quanta to play what you fractaled. A good example of this combo is in a Psiontal deck. Play a Dim to get a few turns to Fractal a Psion and play more the next few turns while you are protected. Another card that goes well with the Dim is Antimatter. Over the time that I have played Elements I have had some success with a Dim Shield/Antimatter stall. Sit behind your Dims and AM your foes strong creatures so when you can’t play a shield you are fine until you get another. Enchant Artifact is yet another card that goes well with the Dim Shield. This one is self explanatory, a shield that prevents almost all types of damage that you can’t destroy. Scary Stuff. The best way to utilize the Dim Shield is to just play them in succession. Wait until the shield has no turns left and play another one for 3 more turns of protection. Start the chain when you see that your foe is dealing massive damage. If you are only taking 5 damage and you start the chain, there is a chance you might run out before you can defeat your foe.
Parallel Universe- Do you like your 12 | 12 Skeleton? Then why not have two of them! That’s right folks, for just 7 Aether quanta you can create an exact copy of your favorite card! With this card you can set up many combos. One combo with Sky Blitz works wonders as a FG killer combo. Get a creature, buff it up, Sky Blitz to double the attack power then PU your new strong creature to have two to then in turn quadruple your original damage. Another card that is a fun friend of Parallel Universe is the Wyrm. Dive, PU, dive, PU, dive, PU. Scary combo to say the least. Doubling the attack to then copy which leads to that doubled attack being doubled, another great FG killer combo. Another card combo that works well with PU is Voodoo Doll. This combo is featured in the funny deck (that works) It’s a Trap. You buff the defence of your Voodoo Doll then PU it so you can have another doll to soak up all that damage. The best way to utilize the Parallel Universe is to get a creature that is a big hitter (or in the Voodoo Doll case a big defender) then PU it to make another one. If you want you can use it on a weaker creature although unless you can support the buffing of more than one creature, it is recommended that you buff a creature then PU it.
Mastering the Cards
Spark|Ball Lightning
Overview
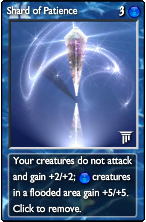
Spark and Ball Lightning are great examples of cards that are mostly useless by themselves, but can shine when used in combos with other cards. They can take on many different roles, such as fodder for Immolation or Mutation based decks or as a target for buff spells such as Blessing and Shard of Patience.
Hints and Tips
Spark and Ball Lightning are airborne and can bypass Wings and be effected by Shard of Freedom and Sky Blitz.
Use Spark as an alternative to Photons in Immolation rushes as fodder as well as an alternative source of damage, especially in restricted PvP rulesets or if you also splash cheap buff cards like Chaos Power, Plate Armor or Blessing.
As Sparks will die on the turn they are placed, they can be a great way to quickly produce death effects to increase stacks on a Bonewall, or generate quanta with Soul Catchers.
Cards that work well with Spark
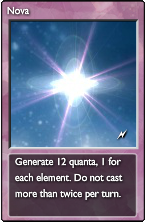
Chaos Power - In an upgraded deck this combo could potentially give you a 10|5 Ball Lightning for only 1 quanta. With Towers or Nova, this should be easy to pull off on the first turn of a game.
Shard of Patience – A great way to buff multiple Sparks. Not only can it buff all the Sparks and other creatures on your field at once, it will also stick around to buff up the next Spark you draw. With Spark having 0 cost this can be a very cheap way to get fast damage.
Fractal – This can often be used as a finisher, a full hand of Ball Lightnings will deal 40 damage by themselves. This can also be used as the start of a bigger combo. For example, double down on the burst damage with a Sky Blitz, use the mass buff of a Shard of Patience to keep all of your new creatures alive and dangerous or use the quick rush of death effects to boost a dying Bonewall.
Sample Deck
With this deck you usually only need 1 turn of Shard of Patience after a Fractal to keep you Ball Lightnings alive before beating down your opponents in a couple of turns. This deck can easily manage 5 turn wins with huge rush damage.
Overview
Spark and Ball Lightning are great examples of cards that are mostly useless by themselves, but can shine when used in combos with other cards. They can take on many different roles, such as fodder for Immolation or Mutation based decks or as a target for buff spells such as Blessing and Shard of Patience.
Hints and Tips
Spark and Ball Lightning are airborne and can bypass Wings and be effected by Shard of Freedom and Sky Blitz.
Use Spark as an alternative to Photons in Immolation rushes as fodder as well as an alternative source of damage, especially in restricted PvP rulesets or if you also splash cheap buff cards like Chaos Power, Plate Armor or Blessing.
As Sparks will die on the turn they are placed, they can be a great way to quickly produce death effects to increase stacks on a Bonewall, or generate quanta with Soul Catchers.
Cards that work well with Spark
Chaos Power - In an upgraded deck this combo could potentially give you a 10|5 Ball Lightning for only 1 quanta. With Towers or Nova, this should be easy to pull off on the first turn of a game.
Shard of Patience – A great way to buff multiple Sparks. Not only can it buff all the Sparks and other creatures on your field at once, it will also stick around to buff up the next Spark you draw. With Spark having 0 cost this can be a very cheap way to get fast damage.
Fractal – This can often be used as a finisher, a full hand of Ball Lightnings will deal 40 damage by themselves. This can also be used as the start of a bigger combo. For example, double down on the burst damage with a Sky Blitz, use the mass buff of a Shard of Patience to keep all of your new creatures alive and dangerous or use the quick rush of death effects to boost a dying Bonewall.
Sample Deck
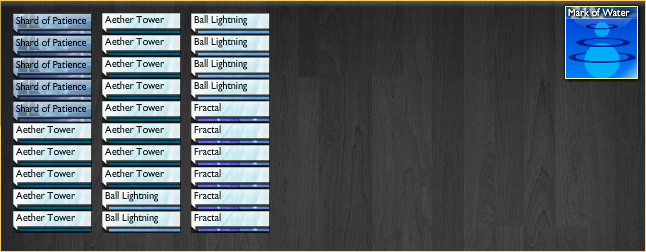

With this deck you usually only need 1 turn of Shard of Patience after a Fractal to keep you Ball Lightnings alive before beating down your opponents in a couple of turns. This deck can easily manage 5 turn wins with huge rush damage.
Parallel Universe|Twin Universe
Overview
Double-up buffs such as Blessing, Momentum or Adrenaline.
This also gives you the benefit of effectively increasing your draw chance of your high priority creatures as once you have
Hints and Tips
When Parallel Universe is used on a creature that has doubled its attack with the Dive ability, the copied creature will retain this doubled attack until Dive is reactivated.
Copied creatures will not be able to use active abilities on the same turn that they are created, even if the original creature would be able to.
Multiple Parallel Universe cards can be used to get lots of damage on the field quickly, providing great burst damage. This is a popular strategy for many PvP and False God farming decks.
If used on a Chimera, Parallel Universe will combine all creatures on your field, as if a Chimera card was played from your hand, rather than creating a second Chimera.
Parallel Universe will also copy negative effects such as Poison.
Cards that work well with Parallel Universe
Crimson Dragon – What’s better than one dragon? Two Dragons! Parallel Universe works well with any high powered creature such as a Dragon to give you twice the fire power without having to pay twice the quanta cost. As the highest attack dragon, Crimson Dragon is a great choice for this combo. Upgraded you can be getting a second 15 attack, 12 :fire cost creature for only 6 :aether.
Voodoo Doll – When a Voodoo Doll is copied any damage it has taken will instantly be reapplied to the opponent. This strategy can be used to deal large amounts of unblockable damage and is the basis for one of the most efficient anti False God decks around.
Mutation – Copying a creature affected by Mutation will apply another stat boost to the creature and give it a new active ability. Parallel Universe allows you to take your most powerful mutant and create one that is even stronger.
Sample Deck
Voodoo Bravery is a popular and efficient False God farming deck. It makes use of Twin Universes effect of reapplying the damage taken to a copied Voodoo Doll to quickly burst down False Gods even from 200HP.
Overview
Double-up buffs such as Blessing, Momentum or Adrenaline.
This also gives you the benefit of effectively increasing your draw chance of your high priority creatures as once you have
Hints and Tips
When Parallel Universe is used on a creature that has doubled its attack with the Dive ability, the copied creature will retain this doubled attack until Dive is reactivated.
Copied creatures will not be able to use active abilities on the same turn that they are created, even if the original creature would be able to.
Multiple Parallel Universe cards can be used to get lots of damage on the field quickly, providing great burst damage. This is a popular strategy for many PvP and False God farming decks.
If used on a Chimera, Parallel Universe will combine all creatures on your field, as if a Chimera card was played from your hand, rather than creating a second Chimera.
Parallel Universe will also copy negative effects such as Poison.
Cards that work well with Parallel Universe
Crimson Dragon – What’s better than one dragon? Two Dragons! Parallel Universe works well with any high powered creature such as a Dragon to give you twice the fire power without having to pay twice the quanta cost. As the highest attack dragon, Crimson Dragon is a great choice for this combo. Upgraded you can be getting a second 15 attack, 12 :fire cost creature for only 6 :aether.
Voodoo Doll – When a Voodoo Doll is copied any damage it has taken will instantly be reapplied to the opponent. This strategy can be used to deal large amounts of unblockable damage and is the basis for one of the most efficient anti False God decks around.
Mutation – Copying a creature affected by Mutation will apply another stat boost to the creature and give it a new active ability. Parallel Universe allows you to take your most powerful mutant and create one that is even stronger.
Sample Deck
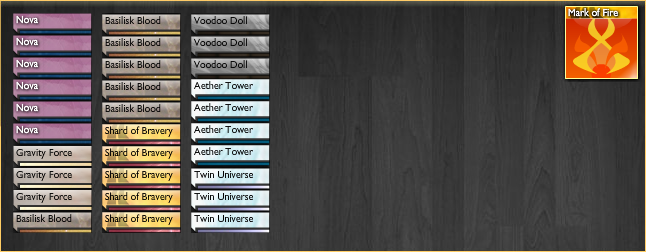
Voodoo Bravery is a popular and efficient False God farming deck. It makes use of Twin Universes effect of reapplying the damage taken to a copied Voodoo Doll to quickly burst down False Gods even from 200HP.
Lobotomizer|Electrocutor
Overview
Lobotomizer is one of a handful of cards that can single-handedly counter many strategies by itself. Any deck that relies on active abilities can be in serious trouble if one of this hits the table early. Whether your opponent is playing Firefly Queens, Nymph Queens or Steam Machines just one Lobotomizer can ruin their day. It can stop Chargers or Psions from breaking through your shields or shut down the Otyugh that keeps eating all of you creatures. This card is an excellent additions to any Aether deck.
Hints and Tips
Lobotomizer does not affect passives such as Devourer or Voodoo Dolls abilities.
A creature that was Lobotomized on the previous turn will not be able to use the abilities from Mitosis or Butterfly Effect on the turn they are played.
As well as removing the ability to grow its attack, Lobotomizing a Steam Machine will stop it from losing damage each turn.
Malignant Cells infest ability can be Lobotomized to stop them from replicating.
Cards that work well with Lobotomizer
Psion – For when your opponent drops a Reflective Shield to shoot your Psion’s spell attacks right back at you, all you need is a Lobotomizer to remove your Psion’s spell damage ability and switch them to punching your opponent instead (at least that’s what I imagine they do).
Dimensional Shield – While Lobotomizer is largely overshadowed by everyone’s favourite super shield, the combination of these two cards makes Aether’s famous defence even more impenetrable. While cards like Momentum, Blue Nymphs or Psions might be a counter to the shield by itself, an early Lobotomizer can quickly change that.
Lightning – Lightning and Lobotomizer can help cover gaps in each other’s defences. Lobotomizer can neutralise some higher HP creatures, such as Nymph Queen, that would require 2 Lightnings to remove, while Lightning can take out those creatures that are simply damage threats. While opponents can try to get around Lobotomizer by playing 2 of a creature in one turn, extra creature control from Lightning can help cut out both of these threats before they can make the most of their abilities.
Sample Deck
A popular and relatively cheap False God grinding deck. While it can be used without Lobotomizer, including 2 or 3 provides a large boost to win rate, neutralising Gods such as Fire Queen and Osiris if one is drawn early, and giving the deck a chance against several other False Gods such as the Unstoppable and Elite Charger using Dark Matter.
Overview
Lobotomizer is one of a handful of cards that can single-handedly counter many strategies by itself. Any deck that relies on active abilities can be in serious trouble if one of this hits the table early. Whether your opponent is playing Firefly Queens, Nymph Queens or Steam Machines just one Lobotomizer can ruin their day. It can stop Chargers or Psions from breaking through your shields or shut down the Otyugh that keeps eating all of you creatures. This card is an excellent additions to any Aether deck.
Hints and Tips
Lobotomizer does not affect passives such as Devourer or Voodoo Dolls abilities.
A creature that was Lobotomized on the previous turn will not be able to use the abilities from Mitosis or Butterfly Effect on the turn they are played.
As well as removing the ability to grow its attack, Lobotomizing a Steam Machine will stop it from losing damage each turn.
Malignant Cells infest ability can be Lobotomized to stop them from replicating.
Cards that work well with Lobotomizer
Psion – For when your opponent drops a Reflective Shield to shoot your Psion’s spell attacks right back at you, all you need is a Lobotomizer to remove your Psion’s spell damage ability and switch them to punching your opponent instead (at least that’s what I imagine they do).
Dimensional Shield – While Lobotomizer is largely overshadowed by everyone’s favourite super shield, the combination of these two cards makes Aether’s famous defence even more impenetrable. While cards like Momentum, Blue Nymphs or Psions might be a counter to the shield by itself, an early Lobotomizer can quickly change that.
Lightning – Lightning and Lobotomizer can help cover gaps in each other’s defences. Lobotomizer can neutralise some higher HP creatures, such as Nymph Queen, that would require 2 Lightnings to remove, while Lightning can take out those creatures that are simply damage threats. While opponents can try to get around Lobotomizer by playing 2 of a creature in one turn, extra creature control from Lightning can help cut out both of these threats before they can make the most of their abilities.
Sample Deck

A popular and relatively cheap False God grinding deck. While it can be used without Lobotomizer, including 2 or 3 provides a large boost to win rate, neutralising Gods such as Fire Queen and Osiris if one is drawn early, and giving the deck a chance against several other False Gods such as the Unstoppable and Elite Charger using Dark Matter.
Task 1
Card 1 – Silence
Breaks chaining cards, similar to CC in a rush but ultimately less effective, can use to OTK or 2TK
Rol hope, monoaether, silent dragons
Silence is one of the least used cards in aether, but it is far from the least useful. When used in rushes, it can be viewed as a weaker form of CC. For example, take a monoaether rush like psiontal and compare it with using lightning vs silence. Silence prevents your opponent from both adding creatures to his side as well as killing your creatures, thus slowing your opponent. This is most effective when chaining silence. However, silence is more expensive than lightning, and your opponent can catch up quickly once the chain breaks. Thus, silence is rarely used in rushes. The best rush that it combos with is PU ruby dragons. Rubies hit hard but are very susceptible to CC, so the silence chain protects them and when used in combo with deflag can lead to 3 straight turns of unopposed damage. However, the most common deck that silence is used is in a stall with fractal as a second win condition. RoL hope is the best example of this as you can easily OTK, but a single silence in the deck can be used to break a dim shield chain for the win.
Card 2 – psion
Monoaether rush, AM duo, Blessed/CP
Lobo often needed
Psions are one of the newest additions to aether, even though they’ve been around for the last couple years. When they first appeared on the scene, many people doubted their potential power, including Higs. I immediately recognized their potential when they came out during war 5, but had to wait til war 6 to unleash them upon the masses. As many are now aware, they are best used in a monoaether paired with fractal or upped spiders (rushier, but weaker against stalls). While the attack/cost ratio is not ideal, lightning and dims are 2 of the strongest control cards in the game and fractal allows you to keep spamming. Also, using both spiders and psions will limit the usefulness of any shields your opponent may have. Outside of monoaether, they aren’t used very much. Because they are countered by reflect, it is often needed to have 1-2 Lobos in our deck. But another option is to use them in an entropy duo with AM or purple nymphs to heal yourself. Liquid shadow is an alternative that allows them to still hit through reflect, but the psions eventually die due to the poison effect. A more common duo with psions is with CP or Blessing, which can buff both attack and HP, making them great PU targets.
Card 3 – quint
Purple Nymph, water nymph, pharaoh, mitosis, even defense to prevent opponent, SoW/reflect from buffing
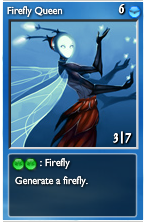
Quintessence is another one of the least used cards in aether. Obviously, if you’re going to waste a card space in order to make another creature immortal, then it better be a damn good creature. While one may think that using it on a high attack creature like ruby dragon, it is probably better used on creatures with abilities. Nymphs are probably the most common creature to be quinted, especially purple nymphs as they have low HP and arguably the best ability of any creature. Most other nymphs have high enough HP that require 2 CC cards to kill, so they aren’t often paired with quints. The next best creatures to quint are probably those that can produce more creatures, such as pharaoh, Firefly Queen, or mitosis-buffed creatures. Most often, this sort of combo is splashed in a large rainbow control deck to ensure creature production. Lastly, quintessence can be used on your opponent to prevent buffing, or more commonly in combination with Shard of Wisdom and reflect.
Card 1 – Silence
Breaks chaining cards, similar to CC in a rush but ultimately less effective, can use to OTK or 2TK
Rol hope, monoaether, silent dragons
Silence is one of the least used cards in aether, but it is far from the least useful. When used in rushes, it can be viewed as a weaker form of CC. For example, take a monoaether rush like psiontal and compare it with using lightning vs silence. Silence prevents your opponent from both adding creatures to his side as well as killing your creatures, thus slowing your opponent. This is most effective when chaining silence. However, silence is more expensive than lightning, and your opponent can catch up quickly once the chain breaks. Thus, silence is rarely used in rushes. The best rush that it combos with is PU ruby dragons. Rubies hit hard but are very susceptible to CC, so the silence chain protects them and when used in combo with deflag can lead to 3 straight turns of unopposed damage. However, the most common deck that silence is used is in a stall with fractal as a second win condition. RoL hope is the best example of this as you can easily OTK, but a single silence in the deck can be used to break a dim shield chain for the win.
Card 2 – psion
Monoaether rush, AM duo, Blessed/CP
Lobo often needed
Psions are one of the newest additions to aether, even though they’ve been around for the last couple years. When they first appeared on the scene, many people doubted their potential power, including Higs. I immediately recognized their potential when they came out during war 5, but had to wait til war 6 to unleash them upon the masses. As many are now aware, they are best used in a monoaether paired with fractal or upped spiders (rushier, but weaker against stalls). While the attack/cost ratio is not ideal, lightning and dims are 2 of the strongest control cards in the game and fractal allows you to keep spamming. Also, using both spiders and psions will limit the usefulness of any shields your opponent may have. Outside of monoaether, they aren’t used very much. Because they are countered by reflect, it is often needed to have 1-2 Lobos in our deck. But another option is to use them in an entropy duo with AM or purple nymphs to heal yourself. Liquid shadow is an alternative that allows them to still hit through reflect, but the psions eventually die due to the poison effect. A more common duo with psions is with CP or Blessing, which can buff both attack and HP, making them great PU targets.
Card 3 – quint
Purple Nymph, water nymph, pharaoh, mitosis, even defense to prevent opponent, SoW/reflect from buffing
Quintessence is another one of the least used cards in aether. Obviously, if you’re going to waste a card space in order to make another creature immortal, then it better be a damn good creature. While one may think that using it on a high attack creature like ruby dragon, it is probably better used on creatures with abilities. Nymphs are probably the most common creature to be quinted, especially purple nymphs as they have low HP and arguably the best ability of any creature. Most other nymphs have high enough HP that require 2 CC cards to kill, so they aren’t often paired with quints. The next best creatures to quint are probably those that can produce more creatures, such as pharaoh, Firefly Queen, or mitosis-buffed creatures. Most often, this sort of combo is splashed in a large rainbow control deck to ensure creature production. Lastly, quintessence can be used on your opponent to prevent buffing, or more commonly in combination with Shard of Wisdom and reflect.
Air has a wide variety of uses, and that shows in its diverse card pool. Wyrm, Firefly Queen, and Owl's Eye all serve very different uses, but unify the element we all know and love as Air.
Wyrm's primary strength lies in it's ability, Dive, which doubles its attack. If your goal is to kill your opponent by damage, and your deck is comprised primarily of Air, chances are there's going to be Wyrms in your deck. Dive double not only the attack of the Wyrm itself, but also any buffs that have been given to it. As such, any card that raises the attack power of the Wyrm is doubly effective. Cards like Chaos Power, Blessing and Shard if Wisdom are all very good fits, and from all different elements too! The only thing holding Wyrm back from being included in most all rush decks is it's high upkeep cost. In order to dive, you need to use two :air, meaning that there's just no room for it in rainbow rushes. In order to be used effectively, you should use a duo (preferably one that can buff its attack, as mentioned), or a trio if you can manage. Usually six copies of a buff card is enough however, so a trio really is just cutting into the consistency of the deck.
Firefly Queen highlights the sheer versatility of Air not only by having an off element cost, but also by having that ability create a third type of quanta (either :light or :fire). It can be seen in some fast decks, but usually you're better off using it in something a bit slower, but not late-gamey. The goal is usually to have the ramping damage from increasing numbers of fireflies take out your opponent while other things keep your opponent from taking you down. Things like Hope and Empathic Bond synergize well, with Hope reducing incoming damage by the number of Fireflies you have, while Empathic Bond heals you for just as much. However, if your heart is set on something faster, there's always Adrenaline, which quadruples the damage output of a firefly thanks to Adrenaline's 'sweet spot' of three attack. Not only that, but it also generates extra :light for....Well, whatever you want, really. Blessings, Shard of Divinity, hell, even Golden Dragon if you want a little more burst.
Finally, we go from slow to slower with Air's rare weapon: Owl's Eye. The main use of Owl's Eye is to take out your opponent's creatures, obviously. Used in combination with other defensive measures, Owl's Eye can wipe out your opponent's armies and leave them with nothing to kill you. Shields like Wings or Bonewall work well, though in different ways. Wings will keep most creatures from reaching you while you chip away at them, while Bonewall will keep you from being hit, and grow when something inevitably dies. Even better is when your opponent has a few smalls creatures, and you just drop Bonewall and ping them down. Cards like Shockwave can accelerate the killing process when time is of the essence, when one source of damage just isn't enough to save you. Even Freeze will allow you to take out a creature while it's not only defenseless, but not harming you.
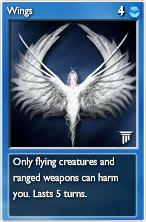

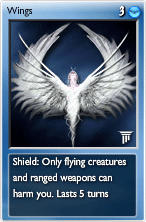
I've always considered Wings to be one of the most interesting Air cards. Against some decks, it is powerful enough to win you the game all by itself. Against others, it is entirely useless. Any deck that wants to slow down the opponent can benefit from the addition of Wings, whether they aim to win by deck out or by damage. Simply play it once your opponent has developed two or three creatures onto the board.
To better understand what it is capable of, and to have a better idea of its limitations, in the spoilers below are the creatures that can hit past Wings and the creatures that cannot.
When you look at the list of creatures blocked by Wings, you'll notice that it blocks many of the most efficient damage-to-cost ratio creatures in the game. Lycanthrope, Mummy, Graboid, Shrieker, Lava Golem, Nymph Queens and Ghost of the Past in particular are all staple cards in some of the fastest decks in the game, both in their upgraded and unupgraded forms. If you want to run a deck with less efficient, slower creatures you need some way to catch up with these faster creatures. Wings gives you 5 turns to do so, which is normally more than enough.
The drawback, of course, is flying creatures. If you're relying on Wings to buy you those extra turns you need to win against a faster deck, and the faster deck is running flying creatures, then it will be a short, painful game for you. Phoenix, Gargoyle, Psions, Sapphire Chargers, many of the Dragons, and in an upgraded format Wyrms and Guardian Angels are all cost efficient creatures that are not blocked by Wings. So how can you mitigate this weakness?
Flesh Spider/Phase Spider
Two powerful cards to use in combination with Wings are the Spiders. Their ability, Web, removes Airborne from the target creature. With a couple of these around even a whole deck of Airborne creatures will have a hard time dealing damage past your Wings. As a bonus, when upgraded both cards are extremely efficient damage dealers.
Owl's Eye
Although less obvious than the Spiders, Owl's Eye is another great addition to a deck with Wings. The ability, Snipe, can kill many dangerous flyers with only one use, such as Seraph, Crimson Dragon, Gargoyle, and Forest Spirit. After 2 uses only 5 Airborne creatures survive, and none of them are very efficient damage dealers. This means that it is very difficult to quickly deal damage past Owl's Eye and Wings when used in combination.
Reverse Time
Many of the cards that can hit through Wings either deal very little damage, or cost an awful lot of quanta to play. Reverse Time loves targeting expensive creatures - forcing your opponent to use their quanta to play one creature over and over and at the same time denying their card draw is very powerful. And if your opponent is using creatures that deal very little damage, well... What are you worried about?
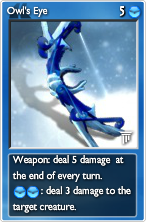
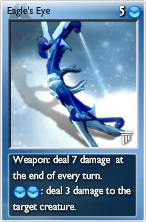
Owl's Eye is, perhaps, my favourite card in the game. It has a good damage-to-cost ratio, both upgraded and unupgraded, which makes it a good choice in aggressive decks. However, the incredible and unique ability is what makes this card so powerful, and a staple in any Air deck that aims to control the opponents creatures. Few cards can generate as much card advantage as this one can.
It is a card that is best used as soon as you draw it, as the ability is limited to one use per turn. The more turns Owl's Eye is on the field, the more creatures you can kill with it. Sniping a high value creature like Crimson Dragon or Arctic Squid can often turn the tide of a game. There are many cards that have great synergy with Owl's Eye. A few of my favourites are listed below.
Flying Weapon
What's better than one Owl's Eye? Two Owl's Eye! With two, three, or even more of these on the field it becomes extremely difficult for your opponent to play creatures that will survive the turn.
Sanctuary
As Owl's Eye is a card that can generate enormous card advantage if given enough time, it makes a lot of sense to play it with cards that will give it that time. Sanctuary performs this task perfectly. Whilst Owl's Eye is in the process of killing any creature your opponent plays, Sanctuary heals off any damage those creatures have dealt to you. This combination can be extremely difficult to play against, and is the base for one of the most powerful deck out decks in the game - the Air/Light stall.
Bonewall
Owl's Eye is a card that can kill a lot of creatures over the course of a game. Bonewall not only gives Owl's Eye the time to kill your opponents creatures, but it also gains layers for each creature that dies. Once a Bonewall is played with an Owl's Eye on the field, there's a good chance that the Bonewall will last until the end of the game.
Although one of the Air cards that sees the least play, Firefly Queen fills an interesting niche. After using her ability three or four times, the damage output from Firefly Queen is enormous. This, plus her high starting health, make her an extremely effective card for any Air/Life or Rainbow deck that need either a high damage output from few card slots or a better ability to stall break. Notable examples of these kinds of decks are Adrenastaves (Adrenaline, Druidic Staff, and Flying Weapon) and various Rainbow stall decks. When you play a Firefly Queen, you should aim to use her ability every time you have the opportunity to do so.
In fact, Firefly Queen has such a powerful ability that it's not unusual to see entire decks built around her. As Firefly Queen is a card that starts slowly, many of the cards in these decks are there to help you survive the weak early game phase. These can be cards such as Wings and Owl's Eye, both mentioned above, Shockwave, Thunderstorm, and many others. Some of the most interesting cards are mentioned below.
Hope
This shield is a key card in any Firefly Queen deck. Each time her ability is used, a Firefly with Bioluminescence is created. For each Firefly, Hope will block 1 damage from each enemy creature. This combination can grow out of control very rapidly, and will often be enough to lock decks out of dealing any damage at all for the rest of the game.
Empathic Bond
Firefly Queen is a card that will produce many creatures over the course of a game. Empathic Bond uses these creatures to help Firefly Queen decks survive the mid-game, and it single handedly allows allows them to beat Poison decks. However, although powerful they are quite expensive cards. I would recommend only using two or three in one deck.
Shard of Freedom
Firefly Queens are quite vulnerable to Creature Control cards like Basilisk Blood, Gravity Pull, and Reverse Time. Shard of Freedom offers some protection against those cards, and provides a great damage boost and very valuable shield bypass. As Firefly Queen produces so many creatures each Shard can have a big impact.
:darknessbig Mastering the Cards :underworldbig
Voodoo Doll
Nightmare
Shard of Void
Voodoo Doll
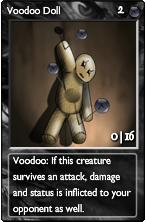  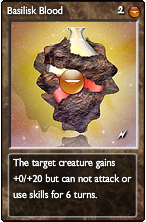  | Ah, pain, and the enemy. What a wonderful combination! Voodoo dolls are an apt representation of darkness, taking whatever damage that may come their way and firing it right back at the opponent. This effect comes from their namesake passive, voodoo. Any negative status effect or damage to voodoo doll is automatically transferred to your opponent. This leads to a surprisingly large number of effective synergies and combinations. While a 2-cost 0|16 creature may seem useless at first, it soon becomes quite evident that voodoo dolls sacrifice their relatively low attack power for extremely high utility and versatility. Offense: If it hurts, it helps voodoo doll. Anger leads to the Dark side. And what better way to express your rage with a bottle or three of rage potions? Rage potion grants your doll an additional 5(6) attack, turning it into a medium power attacker that is almost impossible to kill. In addition, the damage dealt to the doll has the bonus of doubling as a burst of direct damage. Ever wish your opponent had an infectious disease? Then parasites and bloodsuckers are your go-to cards! Parasites can apply poison counters to dolls, which are then transferred over to your opponent. In addition, the damage the doll takes from being poisoned is also dealt directly afterwards, leading to double the damage for as long as the doll lives. Prefer a colder method of revenge? Shard of Patience will stack two attack and HP on your doll for as long as it is in play, at the cost of delaying it. This not only renders your opponent's weapon useless, but creates a nigh-unkillable high attack creature. Defense: Stop hitting yourself. Stop hitting yourself. Stop hitting yourself. With one application of gravity pull, all of your opponent's creatures will find themselves with a new target. With an ordinary creature, this would be the end of it. But with voodoo doll, not only does this stop all physical damage from enemy creatures, it also redirects any damage inflicted right back towards your opponent, assuming your doll lives to take the strike! On its own, even this isn't very effective; 16 hp doesn't tend to last long under gravity pull. This is where the basilisk blood comes in-- each BB adds a whopping 20 hp to the doll, and as the doll's hp stacks higher and higher, the slimmer the chance of the doll dying before your opponent does. Basilisk blood also has the effect of delaying the doll, and this status effect is transferred to your opponent's weapon, blocking it completely for as long as the doll is delayed. Uses: Defend? Attack? Defend? Attack? Do both! Voodoo Doll's high resistance to creature control means that it's an ideal choice for stallbreaking. Whether it's scaling damage through acceleration, poison, and shard of patience, steady defense through basilisk blood and gravity pull, or even simple direct damage through rage potion, voodoo doll's unique strengths have been found to be useful in decks of that nature. A prominent example of this is the popular FG grinder Voodoo Bravery (http://elementscommunity.org/forum/rainbow-decks/voodoo-bravery-%28fg%29%28arena%29%28fast%29%28focused%29/), which rushes to get out voodoo dolls as fast as possible in order to use them as defense. Then, when the doll's HP is low, it is copied through parallel universe to bring about an unblockable one turn kill. Voodoo doll's synergies enable a good defense while simultaneously not neglecting offense. This makes it a good option for domin decks, which aim to deploy a fairly quick offense like rushes do, but also to be able to eliminate or slow down an opponent's own offense. The popular unupped pvp deck It's a trap! (http://elementscommunity.org/forum/rainbow-decks/it's-a-trap!-(unupped-pvp)/) is another example of how voodoo doll can be used to generate a very strong defense that simultaneously encourages a high damage output. | 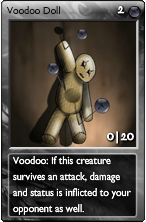 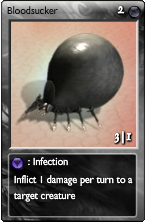  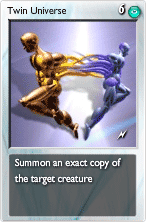 |
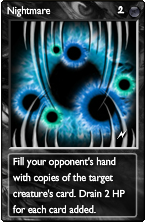    | Fear is the mind-killer. This makes it an ideal choice for dealing with enemies! Mindless enemies are much easier to defeat! Nightmare is one of the only draw denial cards in the game, filling your opponent's hand with copies of a creature on the field. In addition, it drains 2 HP from your opponent per card created and siphons that HP back to you, making it a miniature drain life. This means that nightmare can preform a lot of roles at once-- but it's also a somewhat situational card, as it is generally only packs a big punch the first time it is used. Once a hand is clogged, it usually doesn't become unclogged, so only the first nightmare will have a significant dual-role. The subsequent nightmares will be solely about draw denial. Denial: Stop playing cards! Nightmare synergizes extremely well with other denial cards like silence and earthquake. When used in tandem, they can make a complete mess of your opponent's hand and quanta, often forcing them to discard crucial cards and slowing down their deck significantly, if not stopping it outright. Rewind will return one of your opponent's creatures to their deck, and then nightmare can delay their re-drawing of the card by another turn. Silence will force a player with a full hand to discard a card, and nightmare forces them to have a full hand. Discord and earthquake will reduce an opponent's access to usable quanta, and nightmare can then prevent them from drawing quanta production to alleviate the shortage. Individually, none of these effects will take down an opponent. But when placed together, their efficacy multiplies. Uses: Stop, Drop, and Defeat! Ghostmare (http://elementscommunity.org/forum/duo-decks/ghostmare) is one of the archetypal examples of synergy between denial cards. It stacks draw denial with rewinds and nightmares, creating large periods of time where an opponent is unable to draw cards. In addition, ghosts of the past do damage when discarded, thus making your opponent's hand even more of a mess as they decide between damaging themselves and discarding useful cards, making the draw denial that much more effective. Nightmare chains and rewind spams can be devastating to a player caught off guard, often deciding the game right then and there. Savvier players will hold extra cards in their hands to dilute the power of the nightmare if they recognize the threat, but even this will only do so much against a properly chained nightmare combo. Other Uses: World Domination Nightmare is also a decent splash option in any domin, even without any other denial. In ideal conditions, nightmare will grant one turn of draw denial in addition to a swing of up to 16 hp for 1 quanta cost. Subsequent nightmares will of course be far less potent; however, when put together, these minor nuisances or delays can turn into game-changing ones as the denial and healing buys time to set up your own win conditions. Splashing in a nightmare or three is a strong choice in any domin. Wait, wait, keep playing cards! There are those among us who once walked among the light. But they forswore themselves, haunted by nightmares and empowered by the blessed swords of vampires. We call these fallen warriors...Day Traitors (http://elementscommunity.org/forum/trio-quartet/day-traitors-%28ai4%29%28gold%29%28upped%29%28light%29%28darkness%29/). Day Traitors is a special deck that uses nightmare in a unique way, taking advantage of the fact that the AI will play any creature it can afford to. By nightmaring Rays of Light and then playing Solar shield, DT uses nightmare primarily not as a source of denial, but as a source of quanta! As the nightmared rays of light enter play, they will encounter the unassailable solar shield, which in turn generates quanta for the nightmare user! While this facet of the strategy will not work on a savvy pvp player, any elemental foolish enough to play those rays of light will learn an alternative meaning of why the card is called nightmare. |   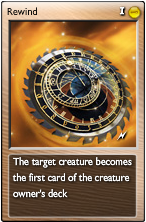 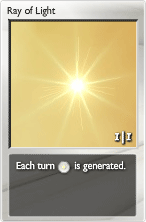 |
     | And if you gaze long into an abyss, the abyss also gazes into you. Your enemies will regret looking you in the eye. For you wield the legendary shards of void, artifacts so powerful that they can reduce the maximum vitality of their targets without damaging them! This effect is increased by 50% when used with a mark of Darkness! Excited yet? . . . Well, you aren't alone. This is why shard of void is often referred to as the single most useless and underpowered shard of them all. Without the mark, shard of void is extremely slow. Even stacked, it would take five shards of void to match one unupped dragon-- and you can have multiple dragons in a deck. Even with the appropriate :darkness, SoV will still slow down any deck's attempt at rushing because the max HP reduction and the physical damage will usualy overlap; SoV only causes "damage" when your opponent is already at or close to full health. Thus, SoV tends to lag behind any decent rush attempt when it comes to speed. This forces any deck that uses it to be built around it. The lesson here? All the other elements have overpowered shards. Darkness' shard encourages elemental pride! It's all about the stall...break. What SoV lacks in speed, it makes up for in pure stallbreaking power. Against any deck that relies on defense, shard of void is a nightmare to face; any healing is utterly useless in the face of maximum HP reduction. Drain life and vampire dagger go very well together with SoV in a mono :darkness deck. The vampire dagger helps you to survive while the voids slowly chip away at your opponent. If harried early, drains and siphons can be used in defense by taking out problematic early creatures and healing to stay alive. Otherwise, they can be kept in reserve as you save up quanta for a last-minute killing burst; it's easier to kill a 50 hp deck with bolts than it is to kill 200. It is important to remember that max HP cannot be reduced below 1, so either the dagger or the siphon is absolutely essential to deal the killing blow. Wait, no. It's all about the stall. No, really. Ironically, shard of void's slow pace means that it synergizes very well with other stalling cards. Any deck that uses voids will certainly be slower than any half-decent rush; thus, users will need to pack defensive cards in order to survive against a rush while waiting for the voids to do their job. Shields and creature control will slow down your opponent's offense. Healing will keep you alive long enough to break down your opponent. One particularly noteworthy example of this strategy is in Zen (http://elementscommunity.org/forum/deck-compilations/zen-%28duo-earth-darkness%29%2818-shards%29%28plat-pvp2-fun-grinder%29/). Zen was a deck that used shards of sacrifice and divinity to stall while waiting for shards of void to whittle down the enemy into kill range. Protect Artifacts ensured that the voids did their job, while a siphon and a dirk would lie in wait for that final, killing blow. Unfortunately, Zen's original incarnation is not very effective now as a result of patch changes. However, the spirit of Zen lives on as people continue to try to make stalls strong enough to handle the burden of SoV. Perhaps one day, they'll even succeed. And another thing... Of course, as a shard, SoV has one final use beyond its ostensible role as a situational stallbreaker-- to create vampyric voodoo shard golems (http://elementscommunity.org/forum/rainbow-decks/voodoo-golems-%28shard-golem%29%28quintet%29%28fun%29/)! One shard of void grants a golem the devourer passive ability. Two will grant it the voodoo passive. Three will make your turn one 18|18 attacker heal you! There's not really that much to say here-- play the nova, play the SoI with SoV. Laugh as your turn 1 high attack vampyric golem demolishes your opponent. (http://i.imgur.com/KJZQGcY.png) | 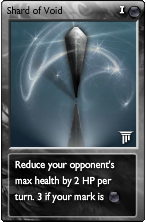     |
Post by: Afdarenty on June 01, 2016, 02:19:08 pm
:darkness Mastering the Cards :darkness
I thought I'd do something a little different here, and go for three rarely used Darkness cards... Liquid Shadow, Cloak, and Parasite. My goal with this task isn't to win bonus points for making a beautiful submission, but to teach other players about how these three rarely-seen cards can be used effectively.
(http://i.imgur.com/SxG1KRl.png)  (http://i.imgur.com/SxG1KRl.png) (http://elementscommunity.org/images/Art/Antimatter.jpg)(http://elementscommunity.org/images/Art/Bone_Wall.jpg)(http://elementscommunity.org/images/Art/Grey_Nymph.jpg)(http://elementscommunity.org/images/Art/Colossal_Dragon.jpg) (http://elementscommunity.org/images/Art/Titan.jpg)(http://elementscommunity.org/images/Art/Steel_Golem.jpg)(http://elementscommunity.org/images/Art/Basalt_Dragon.jpg)(http://elementscommunity.org/images/Art/Rage_Potion.jpg) (http://elementscommunity.org/images/Art/Purify.jpg)(http://elementscommunity.org/images/Art/Nymph_Queen.jpg)(http://elementscommunity.org/images/Art/Light_Dragon.jpg)(http://elementscommunity.org/images/Art/Guardian_Angel.jpg) (http://elementscommunity.org/images/Art/Flying_Weapon.jpg)(http://elementscommunity.org/images/Art/Nightfall.jpg)(http://elementscommunity.org/images/Art/Gargoyle.jpg)(http://elementscommunity.org/images/Art/Voodoo_Doll.jpg) | Liquid Shadow Rarely used in competitive play, Liquid Shadow is in an interesting position - capable of acting as both a powerful buff to your own creatures, and as removal to your enemy's... without particularly excelling at either role. The double-edged sword effect of Liquid Shadow makes it reasonably difficult to use outside of very specific combinations, generally being too harmful to your own creatures to use offensively, and too beneficial to your enemy to use defensively. Within those certain card combinations, however, this little vial of liquid Darkness can really... shine. http://elementscommunity.org/forum/duo-decks/shining-vampires/ http://elementscommunity.org/forum/trial-final-battle-results/(9th-trial-of-gravity)-ginyu-5-0-montrossen/ http://elementscommunity.org/forum/duo-decks/unupped-fg-farmer!-liquid-antimatter-1-28/ Offensively, Liquid Shadow is used to give your friendly creatures the Vampire Ability, stealing your opponent's life with every hit, with the drawback of adding a poison counter to their own health. The impact of this drawback is nullified on creatures with large amounts of health, such as Massive Dragons, Steel Golems, Basalt Dragons and, with additional in-element synergy, Light Dragons. Archangels in Light provide fantastic support for your vampiric dragons, topping up their health as they take gradual poison damage. In-element Gargoyles are solid candidates for the vampire buff thanks to their defensive ability, Stone Skin, but Earth quanta will be required to activate this. Thanks to their absolutely colossal health pools, Flying Titans also make for excellent Liquid Shadow targets - contrary to Liquid Shadow's card text, applying the buff will NOT remove an animated Titan's innate Momentum. Liquid Shadow can also be applied directly to a friendly Voodoo Doll - while they have no attack value out of the box, their tanky HP pools allow them to freely be aided by cards such as Rage Elixir, and buffed even further by Eclipse to make a significant impact against the enemy. By their nature, poisoned Voodoo Dolls will also apply a small amount of poison damage directly to the opponent, and hurt them even further with every tick of damage the doll takes. While it can be argued that there are better uses for Purify, this card will purge all poison counters from the target, allowing it to keep the beneficial Vampire ability without suffering from the poison. Applying Liquid Shadow to a creature that already has two Purify counters on it will only remove one, allowing the creature to keep healing itself at a rate of 1HP per turn. This can be useful to note for Nymph Queen rushes, a strategy which already shares considerable synergy with Darkness. Defensively, Liquid Shadow finds synergy in one of Darkness' favourite partner elements, Death. Bone Wall allows Liquid Shadow to be used on enemy creatures more readily, poisoning them but blocking their attacks, preventing the opponent from stealing any health with the Vampire ability. This strategy provides an extremely difficult scenario for Fire elementals to play around - with a Bone Wall up, Lava Destroyers and Seraphs will do no damage, and die to the single point of Liquid Shadow poisoning. Even more critically, the notoriously resilient and ever-popular Phoenix will die immediately to this strategy - since Liquid Shadow also removes the active ability of the creature it is applied to, Phoenixes will not turn to Ash when they die, and will not be able to be resurrected. Tanky in-element Grey Nymphs provide a strong offensive target for Liquid Shadow once the opponent's forces have been dealt with. Antimatter also works incredibly well with Liquid Shadow when used on opposing creatures - before an AI programming change, this synergy made for a very popular anti-False God deck. Applying the Liquid Antimatter combo to an enemy creature heals you, while simultaneously damaging the opponent, giving two potential win conditions - through damage, or through deckout. |


Cloak | Improved Cloak Cloak provides a mechanic unlike any other in the game - complete field invisibility. Generally considered quite underwhelming for its cost and its relatively short duration, Cloak doesn't see much competitive use either, but can also work very effectively in combination with a few key cards. http://elementscommunity.org/forum/duo-decks/you-can't-see-it!-(darkness)(air)(fun)/ http://elementscommunity.org/forum/trial-final-battle-results/(9th-trial-of-water)-ddevans96-5-4-jonathancrazyj/ Cloak does its best work when it's used to protect "glass cannons" - creatures and permanents that are typically fragile, expensive, high-priority targets, which can change the course of a game if they can survive on the field for as little as a single turn. A single Purple Nymph, Otyugh, Amber Nymph, Shard of Focus or Arctic Squid being allowed to use its ability once can mean the difference between winning and losing a game - either permanently crippling a player's attacking force, or beginning a chain of control that can't be broken out of. Cards that can have an instant impact on the field, but have the majority of their game influence over a couple of turns, such as Blue Nymph, also benefit heavily from Cloak's protection. While an unupgraded Blue Nymph being protected from creature control for a single turn (by a Silence, or a temporary quanta lock from a Black Hole, for example) attacks twice and produces a single Unstable Gas for a total output of 32 damage, three turns of protection under Cloak allows the Nymph to hit four times and produce 3 Unstable Gases, for a whopping output of 84 damage. With support from either Vampire Dagger or Owl's Eye, that's a 100-0 for your opponent within the duration of a single Cloak. Despite being a potential target of permanent control itself, Cloak also helps to protect useful permanents such as Shard of Patience and Eternity. Against the threat of Deflagrations or Steals, the extra layer of protection on top of these key permanents can be crucial for maintaining board control, or squeezing out that extra bit of damage to take the victory. Unfortunately... several hard counters to Cloak exist in the game, and even more unfortunate is the fact that these particular cards already see considerable competitive use. (http://elementscommunity.org/images/Art/Pandemonium.jpg)(http://elementscommunity.org/images/Art/Plague.jpg)(http://elementscommunity.org/images/Art/Rain_Fire.jpg)(http://elementscommunity.org/images/Art/Desiccation.jpg)(http://elementscommunity.org/images/Art/Thunderstorm.jpg) All five of these cards have a specifically-stated secondary function in their card text - "Removes invisibility." Cloak will be destroyed, regardless of how many turn counters remain, and all creatures underneath will take damage normally. Interestingly, the upgraded Lightning Storm contains the card text, wheres the unupgraded Thunderstorm does not - both versions of the card will destroy Cloak, regardless of the difference in card text. | (http://i.imgur.com/SxG1KRl.png)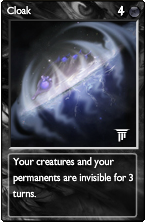  (http://i.imgur.com/SxG1KRl.png) (http://elementscommunity.org/images/Art/Purple_Nymph.jpg)(http://elementscommunity.org/images/Art/Elite_Otyugh.jpg)(http://elementscommunity.org/images/Art/Amber_Nymph.jpg)(http://elementscommunity.org/images/Art/Shard_Focus.jpg) (http://elementscommunity.org/images/Art/Arctic_Squid.jpg)(http://elementscommunity.org/images/Art/Shard_Patience.jpg)(http://elementscommunity.org/images/Art/Blue_Nymph.jpg)(http://elementscommunity.org/images/Art/Eternity.jpg) |

(http://i.imgur.com/SxG1KRl.png) (http://i.imgur.com/SxG1KRl.png) (http://elementscommunity.org/images/Art/Bone_Wall.jpg)(http://elementscommunity.org/images/Art/Grey_Nymph.jpg)(http://elementscommunity.org/images/Art/Nightfall.jpg)(http://elementscommunity.org/images/Art/Voodoo_Doll.jpg) | Parasite | Bloodsucker Parasite's stats aren't much to look at, falling flat against comparable low-cost creatures such as Horned Frog and Lycanthrope, and its Infection ability seems mediocre compared to other repeatable-CC creatures such as Arctic Squid and Iridium Warden, but... recent experimentation into its interactions a handful of key cards have made it quickly climb the ranks as one of my favourite Darkness cards to build with. http://elementscommunity.org/forum/round-6-171/(darkness)-lt-cccombobreaker-3-2-(time)-gen-playeroa/msg1111827/#msg1111827 http://elementscommunity.org/forum/trial-final-battle-results/stop-making-me-do-more-work-dammit/12/ Parasite's options are unfortunately limited by its dual-element cost, essentially forcing it to be used in a deck with Death to make use of its ability. Death, however, does present some incredibly strong cards which pair very well with Parasite - the most important of which is Bone Wall. Once Bone Wall lands on the field, any creatures afflicted with poison from a Parasite's Infection will quickly find themselves turning into more bone shields. Players should carefully time their usage of both of these cards so that none of those precious death effects are wasted - it's often worth holding your Bone Wall in hand and taking the direct damage from an Infected creature, then playing it just before the creature dies, in order to maximize your bone shield charges against the rest of the opponent's forces. Parasite's strongest in-element synergies are with Voodoo Doll, and with Eclipse. As discussed earlier, a Parasite applying Infection counters to a friendly Voodoo Doll will stack poison directly onto the enemy's health bar, and also cause additional damage every time the doll takes damage from the poison. This provides the little bugs with an excellent alternative damage source, allowing them to stack poison on the enemy when there are no creatures to take care of. When used in a Death duo, the powerful Grey Nymph is able to play a similar role - controlling the enemy field with fast-acting Aflatoxin, throwing more poison counters onto the enemy via a friendly Voodoo Doll, and also laying down a considerable physical beating herself. Eclipse fits beautifully into this combination, buffing both Darkness and Death creatures - in fact, with Eclipse on the field, Parasite and Bloodsucker respectively become first equal with Horned Frog and Giant Frog as the creatures with the highest attack:cost ratio in the game. (3:2 for Parasite and Horned Frog, 5:2 for Bloodsucker and Giant Frog.) Eclipse also buffs Grey Nymphs, or any other Death creatures you may also be using, such as Flesh Recluses or Mummies. |
I'm going to discuss of 3 very important darkness cards here.
First : Devourer, why is it so good? Why does it draw bans?
Second : Drain life, why is it so good? Why does it see a surge in popularity?
Third : Steal, why is it so good? Why do i always seem to lose darkness trials to this card?
First of all, proof it draws bans : http://elementscommunity.org/forum/trial-of-darkness/5th-trials-registration-36158/msg457159/#msg457159 ,
https://docs.google.com/spreadsheets/d/1RyjS-VrlxhNr5j1txL80RDloZto6g56E4u7-_kjZvMQ/edit#gid=14 ,
https://docs.google.com/spreadsheets/d/1_nu5wOfiVyYv-aX6O7ox55iP3BtbZsVNlJLriMO6db4/pub?output=html#
I could add a lot more, but I think you get the point.
Devourers are often seen as a one trick pony in pestal, but nothing could be more wrong. Devourer is a complete monster, because it destroys all splashes. If you don't know how devourer works, it has the same chances to steal quanta from any of your pools, regardless of how many quanta you have in it. So 1 devourer has just as much chances to remove your 75th darkness quanta than it does to remove the 1 aether quanta you wish to keep to cast a lightning. Therefore, if you cannot splash cards, like what I call instant CC*, it forces you to either bring a mono deck, or put more quanta/cards in your second element. Devourer heavily scratches a lot of deck ideas, and that'S without counting the decks it is very strong it, like pestal. Devourer not only works great with fractal, but also with cards which use the fact your enemy has less quanta, like reverse time, or a ghost of the past (if your enemy can't play cards, he has to discard, and well if he discards a ghost...)
The cards I call instant CC are the cards that can kill or effectively remove from the game the turn it is played, no matter what quanta you have. I do not qualify drain life in this.
Which leads me to talk about this very card, drain life. This paragraph is going to be extremely subjective. I personally tought drain life was a very bad card as it was very outshadowed by fire bolt, up until I saw one deck. The one deck that changed my view about darkness entirely. This deck would be Siphonary, made, as far as i know, by one of darkness former masters, theonlyrealbeef. Darkness having an effective stall? Yes please. Because, when you look at it, darkness has everything to stall, vampire dagger is the best card in the game in my opinion and I have never hidden that fact. Dusk mantle while being based on luck blocks a lot of damage. Alongside with other stall cards , in siphonary those cards being sanctuary and miracle, it makes drain life shine. While drain life cannot deal 100 damage, the damage done by your vampire dagger is more than enough to claim a win. Now, I have overused siphonary, and lots of variants, but from it came variants that are now different enough to be considered their own decks, like drainbolt. As I said earlier, this paragraph is very subjective.
Steal. Considered by many but myself to be darkness's best card. Steal is a card that takes away a permanent from your opponent, and replaces yours if it is a weapon or shield, and this is what makes me dislike the card.Yes, dislike, I do not like every single darkness card, unlike I like to pretend it. Darkness already has the best weapon and one of the best shields, why would I want to replace them? But in a darkness versus darkness situation, it makes for a whole different system. While you can acquire the best cards in the game, you can also kill strategies, like by stealing dimensional shields, catapults, etc. It is a card I have always made the mistake to underestimate and underuse. A card that has been my demise. A card that almost all alone nearly made me ragequit this community. Steal is strong. Very Strong. Steal works well with cards that ensures your opponent cannot play another of the permanent you stole, whether it be quanta denial ( devourer, black hole, earthquake, discord ...) or another way.
Credit to Aves for most of the Formatting
Name of Task: Mastering the Cards
Evidence of Completion:
Name of Task: Mastering the Cards
Evidence of Completion:
:aetherbigMastering the Cards :gravitybig
Flesh Recluse / Flesh Spider
Bone Wall
Plague
Flesh Recluse / Flesh Spider
  + 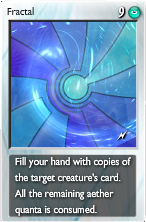  | The difference between utility and utility plus beauty is the difference between telephone wires and the spider web. --Edwin Way Teale In specific meta - that is limited card choice for yourself and/or the opponent - a narrow strategy can be leveraged for your gain! Let us consider the case of the Flesh Recluse [unupgraded: Flesh Spider] where the former is a power play at 6 ATK for 3 quanta and the latter is situational. In-depth discussion of the Spider is excluded here with the general premise of being useful in the non-power-only instances of the Recluse's best uses. With Fractal Fractal is one of the most powerful, if not the most powerful, combinations with Flesh Recluse. The 6-copy limit of any non-pillar non-pendulum card per deck puts a practical cap on how much power you can pack using Flesh Recluses. However, add Aether quanta and Fractal and the power cap is nearly eliminated! The Recluse's 6 attack for 3 quanta ratio of 2-to-1 is tied for 2nd best in the game (Giant Frog of Life is 2.5-to-1) and in many ways surpasses the other 2-for-1 options.
A Fracluse deck (the more proper name for the Flesh Recluse + Fractal combination -- you can probably imagine another way to combine the card names) might look something like this (variations might be proper given various upgrade limiting, elemental composition, and similar deckbuilding restrictions): Fracluse for Mastering the Cards, 10th Trials of Death  Hover over cards for details, click for permalink Deck import code : [Select] Note: The scope of this article does not cover many aspects of deckbuilding, gameplay, and in-game decision-making such as playing a shield or Fractal, playing or holding early-drawn Recluse(s), etc. With Wings Applies to Recluse or Spider Wings is a very strong shield hailing from the Air element. Given Elements' somewhat limited creature card pool, in comparison with most other card games such as Hearthstone or Magic: The Gathering, and the rarity of "flying creatures and ranged weapons" the Wings shield is a strong defensive play of its own accord. The Flesh Recluse's active ability ":air :web" which removes airborne aspects of the target (i.e. - ranged (flown Owl's Eyes) and flying (dragons, etc)) creature has two opportunities for application. The least useful and rarely practical application would be to bring a creature into the "damage dealt" situation for Warden's 'guard' ability. The more frequently implemented and practical application is to increase the effectiveness of Wings. When building a deck to combine Recluse and Wings consideration must be given to available information about the expected encounter or duel/match. Recluse Wings for Mastering the Cards, 10th Trials of Death  Hover over cards for details, click for permalink Deck import code : [Select] Note: The scope of this article does not cover many aspects of deckbuilding, gameplay, and in-game decision-making such as more/less hard/soft-CC, more dragons if Steal (or opposing Wings!) or shield-bypass (Poison) if Steal or a strong opposing shield are expected, etc. With Shard of Bravery Shard of Bravery is all about temporary card advantage. Cheap efficient hitters like Flesh Recluse are a great way to leverage such temporary card advantage. Let's indulge in the rush-heavy fully upgraded realm of Elements, shall we? Here is a place that speed trumps all but not heavily enough to completely eliminate consideration of flexibility and nimbleness. Flesh Recluse being a Death creature opens up the possibility of using the Recluse for fast hard-hitting and in-element shield-bypass of Deadly Poison. Combine with a quanta-sync like a Dragon or two and the stall-breaking-over-time ability of Arsenic and you have flexibility and nimbleness present with speed available with the addition of Shards of Bravery. A deck combining Recluse and Bravery frequently plays like an old Street Fighter match -- mash the buttons and spam what you get as fast as possible! However, a skilled player will be able to find the intricacies of balancing speed and card advantage of the nature that Shard of Bravery brings enjoyable alongside the thrill of 5 turn wins. Arachno-Courage for Mastering Cards, 10th Trials of Death  Hover over cards for details, click for permalink Deck import code : [Select] Note: The scope of this article does not cover many aspects of deckbuilding, gameplay, and in-game decision-making such as when to Shard and when not to Shard, choosing Recluse or Poison plays, etc. |
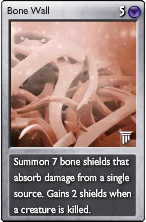 +    | Your own safety is at stake when your neighbor's wall is ablaze. --Horace Bone Wall (BW) is a unique shield card with interaction of the game board events (defense counter increases with death effects), effectiveness of blocking (non-bypass attacks are each entirely blocked - it is not damage reduction nor chance-to-block dependent), and built-in resistance to Permanent Control (PC) (Deflagration and Steal affect only a single counter). Also, BW's resistance to PC is a boost against many rushes that might pack just a few copies of Steal/Deflag or heavier control decks employing Pulverizer or Shard of Focus/Butterfly Effect. With Fire Bolt The power of combining BW with CC could not be farther from an original concept. Avoiding the mainstream and more well-known Bonebolt (BW+Lightning), Pandebonium (BW+Pandemonium), and Cat Walls (BW+Schrodinger's Cat -- albeit this is less common or well-known than the previous two) let us consider the concept from a more flexible and stall-breaking view...(http://i.imgur.com/a0Rw4zM.gif?1)! <Root-nod> Bolt gives additional flexibility, similar to Lightning in Bonebolt but with scaling damage output, with variable use as CC that kills and stacks BW counters or direct damage to the opponent to break an opposing stall. A deck with Fire Bolt and BW could win by deckout {rare}(kill opposing creature damage threats but face healing > poison) or dealing damage reducing opponent to 0 HP (Poison attrition and/or Fire Bolt to face). This would be using BW as long-term defense (building counters through CC) or ability to use BW as basic defense (slow the opposing control deck's damage to allow Fire Bolt to break the opponent). Fire Wall for Mastering Cards, 10th Trials of Death 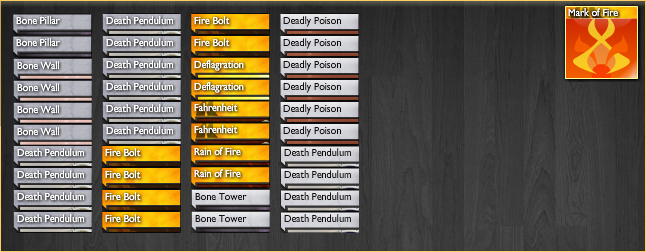 Hover over cards for details, click for permalink Deck import code : [Select] Note: The scope of this article does not cover many aspects of deckbuilding, gameplay, and in-game decision-making such as bolt calculations, using or saving Deflagration, replacing Fire Bolt with Rage Potion/Elixir, etc. With Cremation Cremation (upgraded version of Immolation) is a guaranteed death effect if it is played - death effects synergize with BW! Typically, Cremation is employed alongside powerful Fire-centric rushes (ex: common Crema-rushes) or as instant-infusions of Fire quanta (ex: Unstable Gas spam). It also can be combined with BW to take advantage of the wall-bonus that deaths give to the shield. As with Arachno-Courage, above, upgrades greatly enhance the rushing style of this deck so here we build it completely upgraded: The Counter Mod for Mastering Cards, 10th Trials of Death 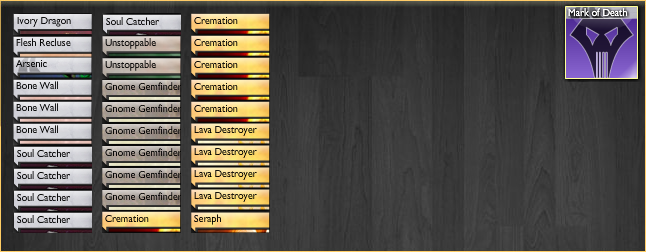 Hover over cards for details, click for permalink Deck import code : [Select] Note: The scope of this article does not cover many aspects of deckbuilding, gameplay, and in-game decision-making such as discard priority in case of poor draw, baiting CC, etc. With Schrödinger's Cat Among the many ways of building decks with BW and the many ways of building decks with Schrödinger's Cat, some upgraded and some unupgraded, some more stall and some more rush, and so on. Here we will focus on integrating Schrödinger's Cat with our be-loved Bone Wall! This is an opportunity to show off the speedy and versatile power of a deck like this - Bone Wall is great defense and when combined here with Soul Catcher provide 2 layers of deterant of opposing CC. The versatility of Death and Entropy duos is touched on here as one could sub Anitmatter for Discords if expecting shield-bypass (Chargers?) or splash Butterfly Effect when you just _know_ a Dim-chain is headed your way. Also, for more firepower the Discords can be removed in favor of our features card above, Flesh Recluses. :) Cat Wall for Mastering Cards, 10th Trials of Death 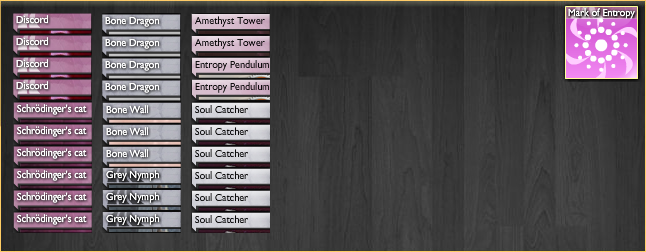 Hover over cards for details, click for permalink Deck import code : [Select] Note: The scope of this article does not cover many aspects of deckbuilding, gameplay, and in-game decision-making such as specific support card choices, CC baiting, etc. |
Plague
 +  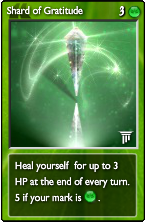   | Last, but not least, avoid cliches like the plague. --William Safire Plague is a seldom used (competitively, at least) CC spell for Death. In the style of Death element, it kills but not instantly (think Retrovirus but a spell... or vice versa). Staying in line with many cards within Death it adheres strongly to the death-effect theme that runs through the Element. The most effective use of Plague, when it is used, combines it with other cards that stall or benefit/boost from death effects. With Sanctuary / Miracle For example, combining Plague and a few other Death control cards one can create a fairly feasible stall. The healing from Sanctuary and Miracle provides the time for Plague to do its CC thing (delayed fashion as it is). Death's nymph (Grey Nymph) is somewhat useful here too as you can fill the board with cells if you are not facing any PC such that your Skull Shield is safe - the 1|1 Malignant Cells cannot penetrate the shield. In this example deck I have also included some other supporting cards like Retrovirus (CC and death effect) and Shard of Divinity (increases healing capacity). White Plague for Mastering Cards, 10th Trials of Death  Hover over cards for details, click for permalink Deck import code : [Select] Note: The scope of this article does not cover many aspects of deckbuilding, gameplay, and in-game decision-making such as varied upgrade quantities, alchemy card(s) or Nymph(s), etc. [color=lime green]With Shard of Gratitude / Heal[/color] This is similar to the White Plague, above, however a few key differences can be noted and discussed. 1. Shard of Gratitude (SoG), given the deck's Life Mark, heals for 5 HP which is 1 greater than Sanctuary. 2. SoG is -1 cost to play. 3. SoG does NOT provide quanta protection. 4. Heal is less expensive than Miracle. 5. Heal is capped to +20 HP compared to Miracle "total HP minus 1". 6. Spine Carapace is a more active and aggressive AoE shield than Skull Shield. 7. Spine Carapace is a more expensive shield but it does allow for 'less other CC' to be required to control spam decks like NT, Scarabs, and some of the high HP Gravity and Earth attackers. Plagued by Gratitude for Mastering Cards, 10th Trials of Death  Hover over cards for details, click for permalink Deck import code : [Select] Note: The scope of this article does not cover many aspects of deckbuilding, gameplay, and in-game decision-making such as which cards are optimal to upgrade, how many Nymph(s) or alchemy card(s) to use, and choice of shield as Carapace or Skull or *both*!?, etc. Elite Otyugh Elite Otyugh is a creature - this is an attempt to illustrate a way to use Plague in a non-stall deck. Plague can be used to assist in bringing larger creatures into Oty's devouring range and to improve chances Skull activates (Sidenote: Skull Shield's chance to activate/Skeleton-ize is %chance=100*(1/(2*[creature's HP])) i.e. - Phoenix is 1 HP so chance% = 100 * (1 / (2 * 1)) = 50%)[size]. The struggle with type of approach to implementing Plague is that the offense in this deck a bit slow - Poison is hard to stop but Oty grows from 0 ATK initially - and it lacks any sort of healing. Hungry Plagues for Mastering Cards, 10th Trials of Death  Hover over cards for details, click for permalink Deck import code : [Select] Note: The scope of this article does not cover many aspects of deckbuilding, gameplay, and in-game decision-making such as deciding when it is best to Gravity Pull your own creature, when to devour and when to let Skull Shield block, whether to devour cells or let them fill opponents' board, etc. |
-Mastering the cards
-Stone Skin is a core card in a number of slower Earth decks. The key to the card is twofold - it both gives you the second-largest burst healing in the game (only to Miracle), and it is one of the only cards in the game that allows your HP to be raised above 100. This card is one of the more skill-testing and mindgating cards in the game - does your opponent have enough damage in hand to burst you down, or can you afford to build up a greater amount of :earth quanta to gain more HP on a later turn. Playing this card too early may result in you not having enough life, but playing it too late can result in premature death. On the flipside, the card is skill testing to play against, as opponents have the opportunity to hold burst in hand to surprise you out of your stone skin with a burst kill, but if you do end up playing it before you die, they will regret not getting the extra turns of damage off. This card is most often played in :light/:earth duos, taking advantage of powerful cards like Miracle and Sanctuary in :light and Auburn Nymph in :earth to lock the opponent out of killing you nearly indefinitely.
Iridium Warden is a surpringsly important creature in :earth based strategies, again being more played in stall-oriented decks. For just one quanta per turn, Warden can be ETG's equivalent of a tapper - it cancels your opponent's best creature out of the game indefinitely, and can change to a different creature if a new creature becomes stronger. The nasty upside to this card is nearly limitless, however, when paired with buffs. Placing a buff such as Blessing on Warden takes it out of range of the most common removal spells and allows it to "punch" any non-flying creature every turn. In doing so, it becomes nearly as powerful as Red Nymph in quickly shutting down the opponent's creature based offense, and is much more resilent than many other lockdown cards. Other powerful buffs to pair with Wardens are the Quintessence/Shard of Wisdom combo, Shard of Patience (buffing a whole field of them at once), and the traditional Blessing. Playing it in any of these duos can give you a powerful way to reach the lategame and dominate it.
Basilisk Blood is easily the most underused and undervalued card in the :earth element, if not the entire game. By spending just two quanta, you can lock an opposing creature out of the game for 6 turns. In addition to being a powerful tempo advantage, often locking down 7-10 quanta cards, it usually gives you significant life advantage. In many faster decks, an opposing creature being locked out of the game for 6 turns literally renders it irrelevant. This card is a powerful option on a splash in a non-:earth deck or a rainbow, pairing amazingly well with Supernova, Nova, and other cheap cards. When paired with Gravity Pull, it lets you turn a creature of your own into a giant blocker, and when paired with Catapult, you can create a giant and unblockable missile to lob at your enemies. In its most traditional use as a rush enabler, it pairs powerfully with Graboids/Shriekers to make up for the slow entry to the battlefield.
Mastering the Cards
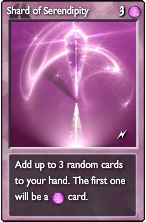
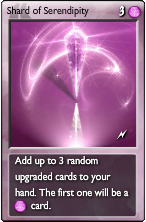
Shard of Serendipity, while it is my favourite card, is not as versatile as it might seem. Most of the time, if you plan on using this card, you can't really use any other entropy card except supernova, unless you plan on packing tons of entropy pillars as well. Having said this, this card is best used in rainbow decks with quantum pillars and supernova in them, or, if you're crazy like me, in mono entropy with supernova. While not being very effective unupped, this card can become great when it is upgraded. Drawing three upgraded cards with a single one for three entropy quantum is a really good deal. Of course, there are times when you can get unlucky and get some pillars, but those cases are pretty rare considering the pool of cards available, which is every card in the game except mark cards, nymphs, shards and Miracle. The cards that work well with Shard of Serendipity are Supernova (not that great with nova), Quantum Pillar, Bonewall (You can get good spells out of Shard of Serendipity to supply your bonewall), Flying Weapon (There are also a lot of weapons, and this helps making them useful rather than clogging your hand) and many others. So if you plan on using this card, keep in mind the cards and the types of decks I mentioned.
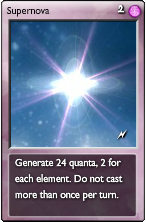
Nova is one of the most versatile and most used cards in the entire game due to its ability to give you a burst of quantum in the early game, allowing you to rush your opponent with cheap and powerful cards. Nova is best used in decks that use cards from all elements, but the total cost of cards for a single element should not exceed four, unless they match your mark's element. In nova decks it's usually recommended to use a few quantum pillars as well to make sure you have a continuous quantum generator. One of the most famous decks uses this card: the Grabbow, also known as Antabow due to the creator's name: Antagon. The cards that work best with Nova are Graboid (cheap creature that most of the time deals at least 10 damage), Forest Spirit (Nova allows you to play this early and grow it before your opponent can deal with it), Arsenic (great value for its cost) and Fog Shield (considered one of the most broken cards in the game due to its ability to do so much for such a low cost) and pretty much any 1 to 4 cost card in the game.
Supernova is actually more powerful than its unupped counterpart, even though it might seem weaker since it costs two entropy quantum to get it played, it allows you to play cards that cost a lot more, giving it a lot more versatility. With Supernova you can use 1 to 8 quantum from a single element, giving you access to cards that Nova decks can only dream of. Supernova is best used in decks that use entropy mark (although it can be used with entropy pendulums and a mark from a different element), a few Shard of Serendipity, several Quantum Pillars and a few cards from each element. One of the most famous decks that use this card is the Loufoquebow (or however your spell that). The cards that work best with Supernova are Shard of Serendipity (you will end up having a lot of spare quantum, especially if you also use Quantum Pillars), Bonewall (having Supernova allows you to use expensive and powerful CC cards as well), Pulverizer (PC on a stick, usable several times in a Supernova deck) and pretty much any 1 to 8 cost card in the game.
To sum up, Nova and Supernova might count as the same card, but they are used in completely different decks, so keep that in mind when you want to build one of those decks.
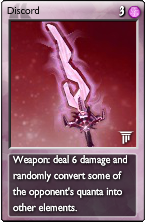
Discord is a very powerful weapon that allows you to potentially win a game with your opponent unable to do anything at all during the whole game. Quantum control is a very powerful aspect in Elements the Game and a very limited one as well. Even though this card was slightly nerfed by reducing its maximum scrambling capability, it is mostly irrelevant to its purpose. Discord is best used in decks that want to win as fast as possible or in some slower denial decks, but it is also usable in midrange decks, though it's almost completely useless in stall decks. One of the most popular decks (and generally not fun if you're on the receiving end) is DBH, which stands for Discord-Black Hole. The aim of the deck is to play Discord early and when it seems like there's nothing more to scramble from the elements your opponent needs, it uses Black Hole to absorb all the scrambled quantum and the cycle starts all over again, and during this time chipping away your opponent's hp with cards like Abomination, Saphire Charger or plain Purple Dragons. The cards that work best with Discord are Black Hole (stated above), Earthquake (similar to black hole, but instead of absorbing the scrambled quantum, you deny their useful quantum directly, leaving them with useless quantum), Devourer (Similar to Black Hole, but it can be played quicker and it also acts as a quantum generator) and many other cards. If you plan on using Discord, keep in mind the deck and the cards I mentioned.
Shard of Serendipity, while it is my favourite card, is not as versatile as it might seem. Most of the time, if you plan on using this card, you can't really use any other entropy card except supernova, unless you plan on packing tons of entropy pillars as well. Having said this, this card is best used in rainbow decks with quantum pillars and supernova in them, or, if you're crazy like me, in mono entropy with supernova. While not being very effective unupped, this card can become great when it is upgraded. Drawing three upgraded cards with a single one for three entropy quantum is a really good deal. Of course, there are times when you can get unlucky and get some pillars, but those cases are pretty rare considering the pool of cards available, which is every card in the game except mark cards, nymphs, shards and Miracle. The cards that work well with Shard of Serendipity are Supernova (not that great with nova), Quantum Pillar, Bonewall (You can get good spells out of Shard of Serendipity to supply your bonewall), Flying Weapon (There are also a lot of weapons, and this helps making them useful rather than clogging your hand) and many others. So if you plan on using this card, keep in mind the cards and the types of decks I mentioned.
Nova is one of the most versatile and most used cards in the entire game due to its ability to give you a burst of quantum in the early game, allowing you to rush your opponent with cheap and powerful cards. Nova is best used in decks that use cards from all elements, but the total cost of cards for a single element should not exceed four, unless they match your mark's element. In nova decks it's usually recommended to use a few quantum pillars as well to make sure you have a continuous quantum generator. One of the most famous decks uses this card: the Grabbow, also known as Antabow due to the creator's name: Antagon. The cards that work best with Nova are Graboid (cheap creature that most of the time deals at least 10 damage), Forest Spirit (Nova allows you to play this early and grow it before your opponent can deal with it), Arsenic (great value for its cost) and Fog Shield (considered one of the most broken cards in the game due to its ability to do so much for such a low cost) and pretty much any 1 to 4 cost card in the game.
Supernova is actually more powerful than its unupped counterpart, even though it might seem weaker since it costs two entropy quantum to get it played, it allows you to play cards that cost a lot more, giving it a lot more versatility. With Supernova you can use 1 to 8 quantum from a single element, giving you access to cards that Nova decks can only dream of. Supernova is best used in decks that use entropy mark (although it can be used with entropy pendulums and a mark from a different element), a few Shard of Serendipity, several Quantum Pillars and a few cards from each element. One of the most famous decks that use this card is the Loufoquebow (or however your spell that). The cards that work best with Supernova are Shard of Serendipity (you will end up having a lot of spare quantum, especially if you also use Quantum Pillars), Bonewall (having Supernova allows you to use expensive and powerful CC cards as well), Pulverizer (PC on a stick, usable several times in a Supernova deck) and pretty much any 1 to 8 cost card in the game.
To sum up, Nova and Supernova might count as the same card, but they are used in completely different decks, so keep that in mind when you want to build one of those decks.
Discord is a very powerful weapon that allows you to potentially win a game with your opponent unable to do anything at all during the whole game. Quantum control is a very powerful aspect in Elements the Game and a very limited one as well. Even though this card was slightly nerfed by reducing its maximum scrambling capability, it is mostly irrelevant to its purpose. Discord is best used in decks that want to win as fast as possible or in some slower denial decks, but it is also usable in midrange decks, though it's almost completely useless in stall decks. One of the most popular decks (and generally not fun if you're on the receiving end) is DBH, which stands for Discord-Black Hole. The aim of the deck is to play Discord early and when it seems like there's nothing more to scramble from the elements your opponent needs, it uses Black Hole to absorb all the scrambled quantum and the cycle starts all over again, and during this time chipping away your opponent's hp with cards like Abomination, Saphire Charger or plain Purple Dragons. The cards that work best with Discord are Black Hole (stated above), Earthquake (similar to black hole, but instead of absorbing the scrambled quantum, you deny their useful quantum directly, leaving them with useless quantum), Devourer (Similar to Black Hole, but it can be played quicker and it also acts as a quantum generator) and many other cards. If you plan on using Discord, keep in mind the deck and the cards I mentioned.
Immolation

Strategy:
1)Immolation is the heart of fire in my opinion. Simply from the description of the card itself we can understand that the purpose of this card is RUSH! We sacrifice a creature and in return we get decent amount of quanta. This card allows us to summon cards right from the very first turn. So, firstly, we consider in what kind of decks immolation would fit in. Rush decks that depend on finishing off the enemy in just a few turns are the most effective way we can use Immolation. These decks should be at least duos since mono fire with immolation wont work fast enough unless it has several upgraded cards including minor phoenix and/or brimstone fire eater and burning towers, in which case a fully upgraded mono fire with cremations-considering you get a decent draw- can be devastating for the opponent.
Now, about which cards we should considered including when building a deck with immolation. Most of those cards are creatures but there are too many cards that synergize well with immolation such as pretty much every card that requires less than 2 quanta to be summoned.
In order to maximize the efficiency of Immolation what you need is a 0 quanta cost creature such as:

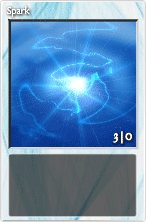

Those creatures will be used as fodders to fuel the primary damage dealers of the deck which will mainly be :

However, what makes Immolation such a good card is the diversity that it provides. It synergizes well with many elements with low level cards and can creature rainbow fire based decks with cards such as:
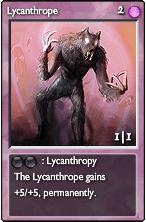
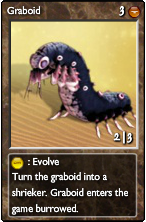
when unupped.
and several other cards when upped, which greatly improves its ttw.
As for the mark of the deck, since Lava Golems will be our main source of damage, you either want Fire Mark or Earth Mark.
In conlusion, Immolation provides Fire with a lot of diversity as well as synergy with other elements and can be the base for creating many fun decks!
Strategy:
1)Immolation is the heart of fire in my opinion. Simply from the description of the card itself we can understand that the purpose of this card is RUSH! We sacrifice a creature and in return we get decent amount of quanta. This card allows us to summon cards right from the very first turn. So, firstly, we consider in what kind of decks immolation would fit in. Rush decks that depend on finishing off the enemy in just a few turns are the most effective way we can use Immolation. These decks should be at least duos since mono fire with immolation wont work fast enough unless it has several upgraded cards including minor phoenix and/or brimstone fire eater and burning towers, in which case a fully upgraded mono fire with cremations-considering you get a decent draw- can be devastating for the opponent.
So, immolation works best when its surrounded by other fire creatures and/or spells that can be summoned immediately. This also should be considered the primary weakness of the card since its synergy with other elements is very limited unless there are several fire cards in the deck.
Now, about which cards we should considered including when building a deck with immolation. Most of those cards are creatures but there are too many cards that synergize well with immolation such as pretty much every card that requires less than 2 quanta to be summoned.
In order to maximize the efficiency of Immolation what you need is a 0 quanta cost creature such as:
Those creatures will be used as fodders to fuel the primary damage dealers of the deck which will mainly be :
[/deck]5f0 5f0 5f0 5f0 5f0 5f0 5f6 5f6 5f9 5f9 5f9 5f9 5f9 5f9 5fa 5fa 5fa 5fa 5fa 5fa 5fc 5fc 5fc 5fc 5l9 5l9 5l9 5l9 5l9 5l9 8po[/deck]
However, what makes Immolation such a good card is the diversity that it provides. It synergizes well with many elements with low level cards and can creature rainbow fire based decks with cards such as:
when unupped.
and several other cards when upped, which greatly improves its ttw.
As for the mark of the deck, since Lava Golems will be our main source of damage, you either want Fire Mark or Earth Mark.
In conlusion, Immolation provides Fire with a lot of diversity as well as synergy with other elements and can be the base for creating many fun decks!
Phoenix

Strategy:
When you think about fire, the first fire creature that comes to mind is probably Phoenix. Phoenix summarized what fire has to offer with its decks. A high damage creature with low defense but can be reborn! Most of fire's creatures are high damage/low defense so the ability to be reborn is especially important for fire decks, since it offers a consistency of damage when up against a high CC deck that can normally counter fire decks.
An example of such a deck is:
Normally such a deck would be easily countered by heavy CC but the ability of phoenix to be turned to ash when killed and be able to be reborn back to phoenix for just 1 fire quantum allows fire to launch such decks with high probability of winning.
When phoenix is unupgraded its synergy with fire is very high with either mono decks such as the above or decks around Immolation(chech above). But, on the other hand, its synergy with every other element is extremely low. Its relatively high cost of 7 fire quanta makes it difficult to be a part of any duo(or trio etc.) deck that doesnt have Immolation in it.
However, enter
Phoenix is a card that when upgraded its cost is vastly reduced and its stats are somewhat lowered. Now, normally this is a downgrade when it comes to mono fire decks but it skyrockets its synergy with other elements.
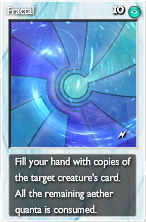 and their upgrades.
Minor Phoenix combines with those cards especially well. When unupgraded, phoenix can be used as a damage dealer in immolation decks as well as a fodder sometimes, but when upgraded, its fodder duties augment due to its low cost which makes the deck a lot faster.
Thanks to its low cost, and relatively high damage considering the low cost, one of the most famous decks around is Fractix.
As for nova, every low cost high damage creature can be used as a part of rainbow, nova based decks. Such is the case for phoenix (only)when upgraded. Its not exactly perfect synergy, neither can you make extremely good decks when you base them towards just nova and phoenixes, but it gives another option whereas unupgraded phoenix doesnt.
In general, phoenix provides fire with a lot of different kinds of options, rush, control, duo possibilites. Both the upgraded and the unupgraded versions of the card serve different purposes thus giving fire a fresh air of versatility.
Strategy:
When you think about fire, the first fire creature that comes to mind is probably Phoenix. Phoenix summarized what fire has to offer with its decks. A high damage creature with low defense but can be reborn! Most of fire's creatures are high damage/low defense so the ability to be reborn is especially important for fire decks, since it offers a consistency of damage when up against a high CC deck that can normally counter fire decks.
An example of such a deck is:
Normally such a deck would be easily countered by heavy CC but the ability of phoenix to be turned to ash
when killed and be able to be reborn back to phoenix for just 1 fire quantum allows fire to launch such decks with high probability of winning.When phoenix is unupgraded its synergy with fire is very high with either mono decks such as the above or decks around Immolation(chech above). But, on the other hand, its synergy with every other element is extremely low. Its relatively high cost of 7 fire quanta makes it difficult to be a part of any duo(or trio etc.) deck that doesnt have Immolation in it.
However, enter
Phoenix is a card that when upgraded its cost is vastly reduced and its stats are somewhat lowered. Now, normally this is a downgrade when it comes to mono fire decks but it skyrockets its synergy with other elements.
and their upgrades.Minor Phoenix combines with those cards especially well. When unupgraded, phoenix can be used as a damage dealer in immolation decks as well as a fodder sometimes, but when upgraded, its fodder duties augment due to its low cost which makes the deck a lot faster.
Thanks to its low cost, and relatively high damage considering the low cost, one of the most famous decks around is Fractix.
Fractix is a very strong deck that uses phoenix to its fullest potential. Single CC is meaningless against this deck and even with mass CC you can just revive the phoenixes later. Its relatively fast and with some form of PC it has a very low ttw.
As for nova, every low cost high damage creature can be used as a part of rainbow, nova based decks. Such is the case for phoenix (only)when upgraded. Its not exactly perfect synergy, neither can you make extremely good decks when you base them towards just nova and phoenixes, but it gives another option whereas unupgraded phoenix doesnt.
In general, phoenix provides fire with a lot of different kinds of options, rush, control, duo possibilites. Both the upgraded and the unupgraded versions of the card serve different purposes thus giving fire a fresh air of versatility.
Lava Golem
Strategy:
Lava Golem is the common example creature of fire. High damage and very low defense. Such is the nature of fire creatures, rush before you die! But, given enough room, lava golems have the potential to grow unstoppable with their ability of +2/+2 with 1 earth quantum. This ability, limits the decks that can be created around lava golems since a mono fire such as:
However, Such mono decks dont bring out the full potential of Lava Golems. Lava Golem's ability is fueled from earth quanta, so its only natural that the best decks that can be creatured based on lava golems have some sort of earth cards/earth quanta in them. Here is such a deck, our very own false god Hermes
The cards the most efficiently accompany lava golems are:
Immolation decks are almost always combined with lava golems and the reason is simple. Immolation not only can summon a lava golem immediately after a fodder is sacrificed but it also generates earth quanta on the process to help laval golem's ability.
Gnome Gemfinders are the most favourable fodder creature for such decks. It acts as a fodder first and foremost, but when immolation isnt drawn or you need some earth quanta gemfinders do just that. They produce earth quanta for lava golems to grow.
Heave Armor can cover the only weakness of Lava Golems, their 1 defense. Having the same type of quanta as laval golem's ability can create powerful fire/earth duos with unkillable lava golems.
An example deck of the synergy of those cards:
Sometimes lava golems can also be used in low numbers in rainbow decks.
All in all, lava golems mainly focus on rushing the enemy with high damage right from the start, and the most effective decks around it do just that.
Strategy:
Lava Golem is the common example creature of fire. High damage and very low defense. Such is the nature of fire creatures, rush before you die! But, given enough room, lava golems have the potential to grow unstoppable with their ability of +2/+2 with 1 earth quantum. This ability, limits the decks that can be created around lava golems since a mono fire such as:
5f0 5f0 5f0 5f0 5f0 5f0 5f2 5f2 5f4 5f4 5f5 5f6 5f6 5f7 5f7 5fa 5fa 5fa 5fa 5fa 5fa 5fc 5fc 5fc 5gi 5gi 5gi 5gi 5gi 5gi 8po[/deck]
although high damage, it is weak to cc and can work only under specific circumstances(low/no CC decks). However, Such mono decks dont bring out the full potential of Lava Golems. Lava Golem's ability is fueled from earth quanta, so its only natural that the best decks that can be creatured based on lava golems have some sort of earth cards/earth quanta in them. Here is such a deck, our very own false god Hermes
This deck and several modified versions of it try to maximize lava destroyer's ability to finish of the opponent with lots of damage right from the start. You bring out the laval destroyer, and if its not dead in a couple of turns, suddenly a 11/5 beast is on the field.
The cards the most efficiently accompany lava golems are:
Immolation decks are almost always combined with lava golems and the reason is simple. Immolation not only can summon a lava golem immediately after a fodder is sacrificed but it also generates earth quanta on the process to help laval golem's ability.
Gnome Gemfinders are the most favourable fodder creature for such decks. It acts as a fodder first and foremost, but when immolation isnt drawn or you need some earth quanta gemfinders do just that. They produce earth quanta for lava golems to grow.
Heave Armor can cover the only weakness of Lava Golems, their 1 defense. Having the same type of quanta as laval golem's ability can create powerful fire/earth duos with unkillable lava golems.
An example deck of the synergy of those cards:
Sometimes lava golems can also be used in low numbers in rainbow decks.
All in all, lava golems mainly focus on rushing the enemy with high damage right from the start, and the most effective decks around it do just that.
Post by: Afdarenty on June 01, 2016, 02:20:03 pm
Elite Charger

This is one of the best cards gravity has to offer. It has good damage to cost ratio, and has shield bypass! The hp is also pretty good, with only lightning and rage potion being able to kill it in one turn. Elite charger can be used in a mono gravity deck, with overdrive. The deck has great rushing potential, as damage increases by 3 on charger, with overdrive. Also, with its high hp of 5, overdrive can take the damage of a single charger up to 23. Combine this with heavy armour, and you have a great hitter, with cheap cost. The card can also be use with fractal. Fractal chargers is another great deck, which has the potential to dish out damage at will. Different versions of fractal charger can also offer some cc, in form of lightning, or one of the best shield in the game; dim shield. Another aether card that works good with chargers, but isnt used as much, is PU. PU can give you multiple chargers fast, and also gives you the option of using it on one of the opponent's creature. Charger's attack of 7 give it the sweet spot for adrenaline. An adrenaline'd charger is able to do 15 damage a turn. Adrenaline also helps against freeze, as it is able to get out of frozen state in 1 turn. Charger also works well with nightmare, as 5 cost is difficult to achieve, unless you have gravity pillar/pend/mark. A good domin, with NM and dagger, can be lethal, as it combines the damage of chargers, with healing of daggers, and denial of NM.

Titan is one of the good weapons in the game. It has good damage of 8, which is able to bypass shield, but that's not all. One of the reasons it's used a lot is due to its HP. When combine with Animate weapon, it has a hp of 50. Imagine an 8/50 attacker that can bypass shield. It's large HP, gives use to another in-element card, gravity pull. Playing flying titan's with GP means that you are able to deal damage fast yourself, while being able to prevent opponent attacking your 100 health bar. However, like every flying weapon, it's prone to 2 cc cards: RT and freeze. RT is a pain for every flying weapon deck. To help against both RT and freeze, we have another in-element card, catapult! By playing titan, and using AW on it, then catapulting it, it is bale to do 34 damage to the opponenet! This is more than 1/3 of the total hp. When frozen, it only adds to this damage, as it is ablt to do 50 damage, taking away half the health! Rage elixir is another card that works well with titan. It gives it 14 shield bypass damage, that is extremely difficult to stop, and RE can also be used to cc opponent's creature, as most creature's are below 6 hp! Another card that does well is crusader. It gains a massive +8 attack boost, and also gets shield bypass, which light on its own lacks. Here is an example combining some of the things i've talked about.
This card is an absolute beast when used right. It's ability is one of the most potent in the game. As a result, any card that buffs hp is beneficial to the otyugh. Blessing does it really well, giving otyugh hp and attack. The deck can not only do well in pvp, but can also take on and defeat the fg Graviton! Another card that Otyugh fares well with is shard of patience. Shard of patience gives otyugh +2|+2 every turn, giving it the ability to devour most creatures. Sopa also helps with one of the problems otyugh has: low damage. With sopa, you can easily take control of the board and build your attack up! One of the most famous plat grinder called Swallow uses this synergy. Otyugh also works well with gravity shield, as any creature with less than 5 hp is devoured and any creature with more than 5 hp is unable to attack. Heavy armour also works great as it raises otyugh's hp by 6! And as it only costs 1, it is extremely fast to set up. Also, heavy armour being in earth helps more, as it gives way to pulvy, which is pc on the stick. Earth also has cards to slow opponent's damage like wardens and earthquake, and also help raise hp, by use of stone skin!
This is one of the best cards gravity has to offer. It has good damage to cost ratio, and has shield bypass! The hp is also pretty good, with only lightning and rage potion being able to kill it in one turn. Elite charger can be used in a mono gravity deck, with overdrive. The deck has great rushing potential, as damage increases by 3 on charger, with overdrive. Also, with its high hp of 5, overdrive can take the damage of a single charger up to 23. Combine this with heavy armour, and you have a great hitter, with cheap cost. The card can also be use with fractal. Fractal chargers is another great deck, which has the potential to dish out damage at will. Different versions of fractal charger can also offer some cc, in form of lightning, or one of the best shield in the game; dim shield. Another aether card that works good with chargers, but isnt used as much, is PU. PU can give you multiple chargers fast, and also gives you the option of using it on one of the opponent's creature. Charger's attack of 7 give it the sweet spot for adrenaline. An adrenaline'd charger is able to do 15 damage a turn. Adrenaline also helps against freeze, as it is able to get out of frozen state in 1 turn. Charger also works well with nightmare, as 5 cost is difficult to achieve, unless you have gravity pillar/pend/mark. A good domin, with NM and dagger, can be lethal, as it combines the damage of chargers, with healing of daggers, and denial of NM.
Titan is one of the good weapons in the game. It has good damage of 8, which is able to bypass shield, but that's not all. One of the reasons it's used a lot is due to its HP. When combine with Animate weapon, it has a hp of 50. Imagine an 8/50 attacker that can bypass shield. It's large HP, gives use to another in-element card, gravity pull. Playing flying titan's with GP means that you are able to deal damage fast yourself, while being able to prevent opponent attacking your 100 health bar. However, like every flying weapon, it's prone to 2 cc cards: RT and freeze. RT is a pain for every flying weapon deck. To help against both RT and freeze, we have another in-element card, catapult! By playing titan, and using AW on it, then catapulting it, it is bale to do 34 damage to the opponenet! This is more than 1/3 of the total hp. When frozen, it only adds to this damage, as it is ablt to do 50 damage, taking away half the health! Rage elixir is another card that works well with titan. It gives it 14 shield bypass damage, that is extremely difficult to stop, and RE can also be used to cc opponent's creature, as most creature's are below 6 hp! Another card that does well is crusader. It gains a massive +8 attack boost, and also gets shield bypass, which light on its own lacks. Here is an example combining some of the things i've talked about.

This card is an absolute beast when used right. It's ability is one of the most potent in the game. As a result, any card that buffs hp is beneficial to the otyugh. Blessing does it really well, giving otyugh hp and attack. The deck can not only do well in pvp, but can also take on and defeat the fg Graviton! Another card that Otyugh fares well with is shard of patience. Shard of patience gives otyugh +2|+2 every turn, giving it the ability to devour most creatures. Sopa also helps with one of the problems otyugh has: low damage. With sopa, you can easily take control of the board and build your attack up! One of the most famous plat grinder called Swallow uses this synergy. Otyugh also works well with gravity shield, as any creature with less than 5 hp is devoured and any creature with more than 5 hp is unable to attack. Heavy armour also works great as it raises otyugh's hp by 6! And as it only costs 1, it is extremely fast to set up. Also, heavy armour being in earth helps more, as it gives way to pulvy, which is pc on the stick. Earth also has cards to slow opponent's damage like wardens and earthquake, and also help raise hp, by use of stone skin!
Trials #1
Mastering The Cards
Adrenaline
Adrenaline is life's alchemy card pairing with Green Nymph, and allows creatures to attack multiple times in a single turn. For this reason adrenaline is usually used in rushes due to the extra attacks given to the creatures. Depending on the creatures Attack amount it can give and extra 1,2,3, or even 4 attacks. When looking at the most effective way to use this card, it is good to know where the 'sweet spots' for it are in regards to attack values. The 'sweet spots' are the maximum total damage for each number of attacks, these values are when a creatures attack is 0(5 attacks), 3(4 attacks), 8(3 attacks), or 15(2 attacks).
Another effective way to use Adrenaline is on creatures with passive abilities; venomous creatures (Scorpion, Puffer Fish, etc), quanta generating creatures (Firefly, Ray of Light, Gnome Rider, etc), vampire creatures (Vampire, Liquid Shadow targeted creatures, etc). By adding adrenaline onto creatures with these effects a scorpion can add poison to the opponent twice per turn, a devourer may steal tice the normal quanta, or a firefly can generate 4 light quanta per turn.
A few key cards that work exceptionally well with adrenaline include:
Emerald Shield
Emerald shield is one of the 2 shields that life has, and both has a damage reduction and a spell reflection. Being a shield this deck is rarely used in rushes, but more so useful in stalls and slower rushes. The shield reduces incoming physical damage by 1, so paired with some form of healing this can help with those slower rushes that can't out rush the fastest rushes. Another benefit of emerald shield is that it is immaterial, meaning that it can not be destroyed or stolen, which is very good when wanting to guarantee a defense against multiple low attacking creatures.
A few key cards that work really well with Emerald Shield include:
Forest Scorpion
The forest scorpion is a creature that will deal 1 damage per attack, adds 1 poison counter to the opponent per hit, and has a health of 2. At first glance this creature may not look like much due to it's low stats, but upon use and the right combination of cards this creature can be a real annoyance. When looking at where this creature fits in to deck types he is usually in breaks due to his poison being a bypass of shields, or in rushes when paired with adrenaline for the speed burst and muliple poison counters that can stack up quickly.
A few cards that pair really well with forest scorpion include:
Mastering The Cards
Adrenaline
Adrenaline is life's alchemy card pairing with Green Nymph, and allows creatures to attack multiple times in a single turn. For this reason adrenaline is usually used in rushes due to the extra attacks given to the creatures. Depending on the creatures Attack amount it can give and extra 1,2,3, or even 4 attacks. When looking at the most effective way to use this card, it is good to know where the 'sweet spots' for it are in regards to attack values. The 'sweet spots' are the maximum total damage for each number of attacks, these values are when a creatures attack is 0(5 attacks), 3(4 attacks), 8(3 attacks), or 15(2 attacks).
Another effective way to use Adrenaline is on creatures with passive abilities; venomous creatures (Scorpion, Puffer Fish, etc), quanta generating creatures (Firefly, Ray of Light, Gnome Rider, etc), vampire creatures (Vampire, Liquid Shadow targeted creatures, etc). By adding adrenaline onto creatures with these effects a scorpion can add poison to the opponent twice per turn, a devourer may steal tice the normal quanta, or a firefly can generate 4 light quanta per turn.
A few key cards that work exceptionally well with adrenaline include:
- Minor Vampire - as it can heal up to 8 hp in a turn while dealing damage (12hp if nightfall is in play)
- Animated Druidic Staff - it can heal up to 20 hp per turn, even if the staff is frozen or delayed.
- Overdrive - can ramp its damage very fast, and quickly change a 1attk creature to a 15+attk creature in a few turns.
Emerald Shield
Emerald shield is one of the 2 shields that life has, and both has a damage reduction and a spell reflection. Being a shield this deck is rarely used in rushes, but more so useful in stalls and slower rushes. The shield reduces incoming physical damage by 1, so paired with some form of healing this can help with those slower rushes that can't out rush the fastest rushes. Another benefit of emerald shield is that it is immaterial, meaning that it can not be destroyed or stolen, which is very good when wanting to guarantee a defense against multiple low attacking creatures.
A few key cards that work really well with Emerald Shield include:
- Shard of Wisdom and Quintessence - When paired with these two cards you can give you opponents creatures spell damage with your reflective shield they will continue to damage themselves, with the added benefit of the shield being immaterial so they cannot remove your shield.
- Fire Bolt, Ice Bolt, Drain Life - Spells that need time to 'charge' their quanta for critical damage need some way to stall while waiting to strike. Emerald shield can reduce the damage for stalling while waiting for the 'quanta charge' but more importantly, if the opponent plays a reflective shield and tries to render your bolts useless you can bolt yourself and reflect them to your opponent.
Forest Scorpion
The forest scorpion is a creature that will deal 1 damage per attack, adds 1 poison counter to the opponent per hit, and has a health of 2. At first glance this creature may not look like much due to it's low stats, but upon use and the right combination of cards this creature can be a real annoyance. When looking at where this creature fits in to deck types he is usually in breaks due to his poison being a bypass of shields, or in rushes when paired with adrenaline for the speed burst and muliple poison counters that can stack up quickly.
A few cards that pair really well with forest scorpion include:
- Adrenaline - This will allow Scorpion to deal up to 4 damage per turn, and apply 2 poison counters per turn. This can ramp up quickly if not destroyed or healed fast. By the fourth attack the scorpion has dealt over 16 direct damage and applied more than 8 poison counters totaling over 24 damage almost a quarter of your opponents full health.
- Antimatter - Antimatter will cause your scorpion to heal you opponent 1 hp, but it will also allow it to pass through shields regardless of damage reduction and still apply a poison counter. This is a nice combo because Antinmatter can be used on opposing creatures to heal yourself while waiting for the scorpions poison damage to reach massive amounts, or can be used on the scorpion itself to bypass shields to apply extra poison counters.
- Momentum - momentum allows creatures to bypass shields and adds 1 extra attack and health. By applying this buff to a scorpion the scorpion can bypass all shields and apply its poison counters to the opponent, while also gaining a minor attack and health boost.
Mastering the Cards
I decided, for my card spotlights, I would take a look at the lowest rated cards on life’s element subthread. This included Shard of Gratitude at 4 votes, Cockatrice at 5, and Jade Dragon at 6.
Shard of Gratitude
I decided, for my card spotlights, I would take a look at the lowest rated cards on life’s element subthread. This included Shard of Gratitude at 4 votes, Cockatrice at 5, and Jade Dragon at 6.
Shard of Gratitude
Shard of Gratitude is most easily used in a stall deck. Stall decks in elements are atypical, in games like magic; a stall deck will revolve around building a pillowfort of cards and hiding behind it. In elements, we don't have such a luxury; instead we must focus away from damage prevention, and into recovery. Shard of Gratitude is simply, pound for pound, the most healing you will get from a base permanent. Yes, Sanctuary has a strong similarity with this card, but all the more reason to use them together. Light and life are already swimming in synergy, namely leaf dragon, going from the max 30 healing per turn with Shard of Gratitude to 54 with sanctuary's is just over half your health every turn. With this incredible healing per turn, you have the time to set up and strengthen one of elements few pillowfort cards, Hope. This is of course disregarding life’s three other healing cards, and light’s three other healing cards. All together you have a grand total of eight healing cards and one of the strongest potential shields in the game.
CockatriceCockatrice might take second place compared its competition, horned frog, but that to me seems like an unfair comparison. Cockatrice is like a hardier version of frog, and in fact, in the standard life rush, they are used together. Let’s compare the cards themselves, horned frog is a 2 quanta 5/3, and cockatrice is a 3 quanta 5/5. This is effectively, 1 quanta for an extra bit of health. Cockatrice is used as an additional cheap creature, often with frogs, not only because they are relatively the same, and still very cost effective, they also can deal with situations frogs cannot. Rain of fire is a card that tends to devastate frogs, cockatrice however is sturdy enough, both upped and unupped, to survive it, forcing the opponent to either burn another card to deal with it, or simply accept the remaining damage. In a rush deck, which is the primary place one would find and use cockatrice, it is difficult to survive the pushback some elements can send, cockatrice not only helps to survive this pushback, it also serves to deal cheap, quick damage. Cockatrice gets an insanely bad rap because it is viewed in the same light as horned frog. The stability cockatrice offers often makes it a better target for buffs, like mitosis, and can rapidly force opponents to use multiple burn spells on it, clearing the way for softer frogs.
Jade DragonSince nearly all of the unupgraded dragons start off with relatively similar base stats (right around 10/5) this paragraph will focus on primarily on its upgraded variation, 12/9. Jade dragon sits in a nice and steady middle ground. It has enough damage to be tied, or stronger, than about half the other dragons available, and much like cockatrice, is sturdy enough to take quite a few hits. With 9 health, there are very few situations in which jade dragon can be removed with a single card, most of the ways of dealing with jade dragon are rather soft CC cards that will only delay the issue. Since jade dragon has quite a bit of damage, it can be used easily with parallel universe without breaking the bank for life quanta as fractal would. Jade dragon can also easily be hit with rage pots, leaving it a small bit of room to avoid cc, though 3 health is usually considered the resistant or nonresistant threshold. Jade dragon is often used in the slower stall variations of life decks, like a life/firestall. Unlike in the standard light/firestall, you’ll almost always have too much life quanta. Tossing in a jade dragon or two allows you to move rage pots otherwise used for CC into damage, while finding a use for that plentiful life quanta.
Mastering the Cards
|
|
|
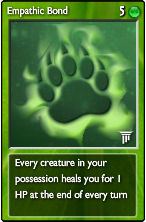
Mastering the Cards (AKA "Your word counts are now diamonds!")
Usage #1: Small creatures with Abilities
Adrenaline's ability to increase the number of attacks from a creature per turn also gives it nice usability in conjunction with lower attack creatures with abilities, such as Ray of Light, Firefly, Devourer, Forest Scorpion, Minor Vampire, Druidic Staff etc. In this context, outside of having a :life requirement, Adrenaline can see usage in a wide variety of deck archetypes, ranging from pure rush to some forms of stall. However, its best usage comes into play when the user is able to take full advantage of the creature that the spell is being applied to, as many of the creatures listed above are extremely frail and are very susceptible to almost all forms of creature control. Let's take a look at and discuss the implementation of some of these strategies.
Usage #2: Higher attack creatures with more durability
Outside of lower Attack creatures, more expensive creatures with 7 or 8 Attack points make excellent Adrenaline targets in decks that can afford to wait for the extra quanta generation to take place. In unupgraded play such cards include Phoenix (though it benefits much more from the effects of a Green Nymph than Adrenaline/Epinephrine itself due to its fragility) and Graboids/Shriekers. For upgraded cards, suitable targets include Elite Chargers, Archangels, and Massive Dragons, all three of which typically have enough HP to more readily look over Adrenaline's weakness to CC.
Usage #1: Cheap creatures with Abilities
Lower cost creatures have the benefit of potentially changing the flow of the game more quickly in the absence of creature control while more expensive creatures come out later but if used correctly can stick around on the field and continue to generate more and more damage dealers. Which of the two strategies is best for using this card is mainly dependent on what supporting cards are used to allow Mitosis to be used effectively. In some cases it's simply better to throw caution to the wind and attempt to spawn as many creatures early on as possible, while other times it's better to make use of cards such as Silence and Cloak for protecting creatures from CC.
Usage #2: More expensive creatures with higher Attack
As mentioned previously, another viable usage of Mitosis is to combine it with more expensive creatures that are considered stronger and also more durable. More expensive creatures will need ways to mitigate damage in the early to mid game, which may make cards such as Heal, Stone Skin, Miracle, Sanctuary, and Dimensional Shields very desirable.
Card 1: Adrenaline


Adrenaline and Epinephrine are simply one of the best damage boosters that this game has to offer and are in some cases essential for giving lower (0 to 3) Attack creatures usage in decks outside of gimmicks. Adrenaline's ability to tear down Bone Wall charges, delay turns, and freeze turns are all factors to be considered when expecting to face decks that could make use of those cards.Usage #1: Small creatures with Abilities
Adrenaline's ability to increase the number of attacks from a creature per turn also gives it nice usability in conjunction with lower attack creatures with abilities, such as Ray of Light, Firefly, Devourer, Forest Scorpion, Minor Vampire, Druidic Staff etc. In this context, outside of having a :life requirement, Adrenaline can see usage in a wide variety of deck archetypes, ranging from pure rush to some forms of stall. However, its best usage comes into play when the user is able to take full advantage of the creature that the spell is being applied to, as many of the creatures listed above are extremely frail and are very susceptible to almost all forms of creature control. Let's take a look at and discuss the implementation of some of these strategies.
Firefly 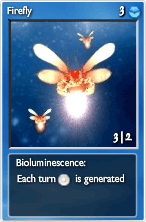 | I had originally intended to use this deck in Trenzalore, though I never really had the opportunity due to other options seeming more appealing to me. Though incredibly simple, the beauty of this deck is effectively based on two different components. Firstly is the synergy of Adrenaline with Fireflies, a 3 attack creature which uses Adrenaline to attack four times for a total of 12 damage while also producing 4 Light quanta. The 15 Pend setup in this deck allows for Firefly Queens to be played as early as turn 3 relatively often, which also generally means that a Firefly can be expected to spawn on turn 4, with Hope being played as early as turn 6. The deck can also be reconfigured to cut down on other cards such as Hope and Adrenaline in exchange for Miracles. The second beautiful synergy with Adrenaline here is the interaction between FFQ and Adrenaline. Naturally Adrenaline doesn't do anything for FFQ's ability since it can only be used once per turn, but FFQ's respectable HP stat in conjunction with the magical 3 attack stat gives yet another 9 total damage increase with a creature that is significantly harder to remove from the field. This strategy also works well in full-offense by substituting Hope for Shards of Freedom. | Firefly Queen |
Ray of Light | I had actually submitted this deck as a Half-Blood grinder during the Proving of Worthiness Phase of Trials 6 (http://elementscommunity.org/forum/trial-archive/6th-trials-proving-your-worthiness-(submission-topic)/msg1002696/#msg1002696). I go into much more detail of the deck's function there, but basically the purpose of Epinephrine in this deck is to firstly get the deck up to speed by generating massive amounts of Light quanta early on in the game. Once setup has been achieved, it can then be used on Crusaders to mass produce healing for the remainder of the duel. Naturally similar tactics can be used with Luciferin but are much slower and more vulnerable to CC, since many of them also rely on Hope for defensive support. Losing a Ray of Light in this case is not the end of the world since in most cases the quanta has already been mass generated by the time the Ray of Light is recognized as a threat, which opens the gateway for Crusaders to come in and do their thing(s). | Luciferin  |
Devourer  | I was somewhat surprised to find that a more refined deck featuring this combination of cards had not yet been posted to the forums (from what I could find), though I suppose it does make sense when considering the fact that Mitosis in most scenarios is much more beneficial when used with Pests. Epinephrine in this case can be used to increase the amount of quanta absorbed per turn (only from 1 to 2, however) but because Pests start with 0 attack, they require Eclipse as support in order to be able to do serious damage with Epinephrine, which then increases their damage output from 2 to 8. With Green Nymphs in place of Epinephrine, this deck likely becomes much more deadly. | Pest  |
Druidic Staff  | Quite possibly the most infamous usage of Adrenaline in modern PvP environments, Adrenastaves is one of the few "mono" Life decks that can be expected to receive a great deal of competitive play. Not only do Druidic Staves typically remove Life's typical weakness to creature control with their sizable amounts of HP, but the 20 HP generated by the staves allows the deck to shrug off damage from many rushes and its rapid damage output can also give it some bite against slower decks as well. The 2 attack leads to problems against shields when decking out or OTK strategies become an option, which is why most variants of Adrenastaves will also incorporate cards such as Thorn Carapace, Green Nymphs, and Shard of Freedom into the mix. In environments where more upgrades are permissible, it also becomes possible to swap out Flying for Animate Weapons while also adding Explosions or Deflagrations for permanent control. Monks is a deck name coined by former Life veteran ak65ala which represents almost any deck which makes use of Crusaders, flying Jade Staves, and Adrenaline. In fact, he actually posted a variant during Trials #4 for use against the Arena (http://elementscommunity.org/forum/trio-quartet/monks-vs-arena/msg400212/#msg400212). Though the function of this deck is very similar to Adrenastaves, the addition of Crusaders gives the deck more of a bite versus decks with Shields while also giving the player access to yet more healing. Unfortunately upgrading Druidic Staves does come with the cost of decreasing the HP healed per turn from 20 to 15, but in Monks's case, this is mitigated by the addition of 6 Crusaders providing 15 HP of healing as well in addition to the Crusaders serving as magnificent Epinephrine targets both when Endowing the Jade Staves and when not Endowing them. Because Crusaders hit a total Attack stat of 7 when Endowing Jade Staves, this allows them to hit what is considered to be yet another magical number of Adrenaline/Epinephrine, which effectively gives them a total damage output of 15 instead of 7. | Jade Staff  |
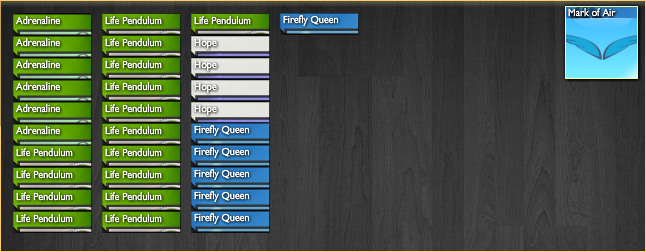
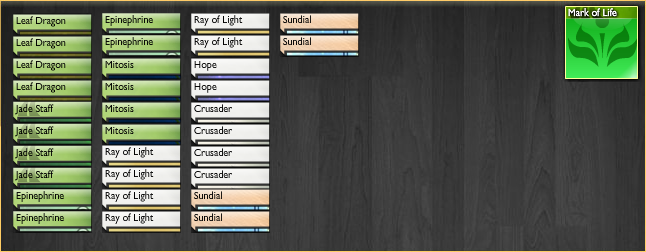
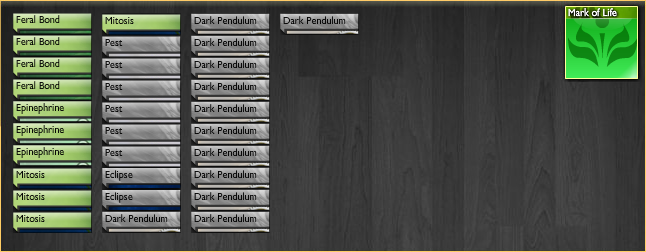
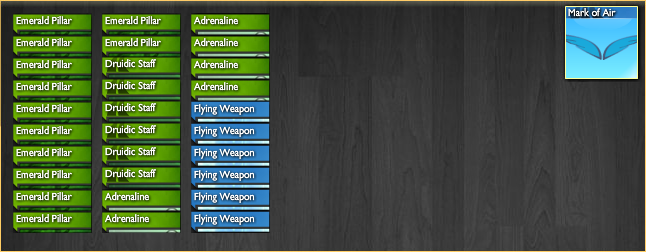
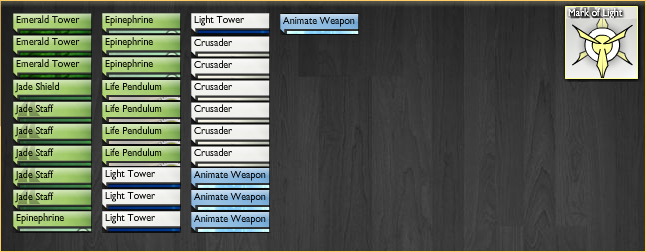
Forest Scorpion  | A deck used by myself during the final battle phase of Trials 6 (http://elementscommunity.org/forum/trial-final-battle-results/(6th-trials-life-final)-helston-2-5-willng3/), it boasts a great deal of speed as well as shield bypass, which is oftentimes something that Life struggles with. Scorpions in this case not only make excellent targets of Epinephrine but also allow additional damage to take place even if they are removed from the field, in the form of poison. Though Epinephrine unfortunately only increases the poison inflicted per Scorpion from 1 to 2, it still offers a potential solution to massive amounts of CC if played early enough in the duel. Used by Team Water during the previous War, this deck offers the same type of offensive advantages of Scorpions in the previous deck with the exception of the shield bypass given by Momentum. However, in exchange for this, this particular model also features additional Adrenaline synergy with Adrenastaves, which allows the deck to stall long enough for Puffer Fish damage to come into play. Nymph's Tears also help to provide additional support by spawning Green Nymphs in the absence of Adrenaline. Puffer Fish's higher HP stat also helps to avoid CC more so than Scorpions. | Puffer Fish  |
Minor Vampire  | AdrenaVamps is a tricky deck to use simply because the fragility of Minor Vampires requires that Cloaks be used as protection from CC or else the deck will practically automatically lose. It also becomes much more potent when Nightfall is on the field and Minor Vampires are able to deal and heal 12 damage at a time, but we run into an issue at that point of having to pick and choose what cards need to be removed from the deck in order to draw Nightfall reliably, which is a problem that I commonly find when creating duos with Darkness. Regardless, if the pieces necessary for the combo to work are drawn, it may become quite difficult for the opponent to recover in time. | Cloak |
Damselfly  | In this deck, yet again used by myself in Trials 6 (http://elementscommunity.org/forum/trial-final-battle-results/(6th-trials-life-final)-helston-2-5-willng3/msg1016621/#msg1016621), we see two of my favorite combinations to use with Epinephrine: Damselflies and Elite Queens. Though I've already alluded to my reasons for loving the Elite Queen combination, Damselflies are a bit of a new addition that can be seen to serve a similar purpose to Ray of Light. However, I personally prefer to think of Damselflies as both vital quanta producers and great damage dealers. 8 total damage while generating 4 Air quanta per turn for the low cost of 3 Life quanta is certainly nothing to sneeze at, and it also helps alleviate this type of deck's dependence on Pendulums in order to fuel the quanta needed to play Elite Queens, Blue Nymphs, etc. And the best part of a strategy like this is that because it can setup so quickly, simply getting rid of a Damselfly isn't necessarily enough to repair the damage that it has already inflicted; by that point, the Queens will have likely become a much larger threat. Gnomes serve a similar purpose in Earth duos but instead usually opt for slower paced deck builds which may or may not incorporate Stone Skin and the like into the works. | Gnome Gemfinder |
Horned Frog  | Commonly seen as the staple deck of Life's arsenal, this standard Mono Life rush ignores all forms of caution and instead focuses on pure, wholesome damage output. Horned Frog becomes the best target for Adrenaline in almost all scenarios, granting a total magical 9 damage boost. Cockatrice may also be selected for their additional bulk or due to lack of Horned Frogs at the time. With access to Green Nymphs, it becomes possible to construct a more durable version of the standard Mono Life rush while also removing some of the reliance on drawing Adrenaline in order to keep up the deck's damage output. As if this weren't enough, Green Nymphs also serve as an even better Adrenaline target than Horned Frogs and are self-sufficient. The revisions made here still offer next to nothing for bypassing certain shields but it certainly does help alleviate some of the deck's weakness to CC. | Green Nymph  |
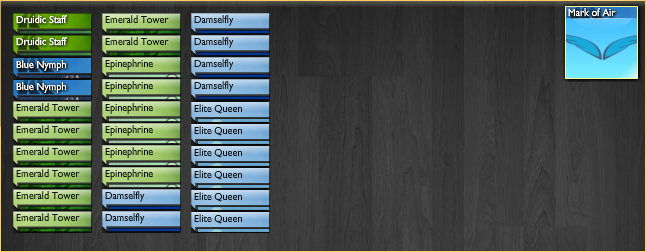
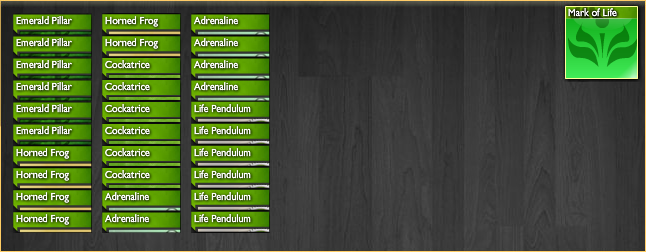
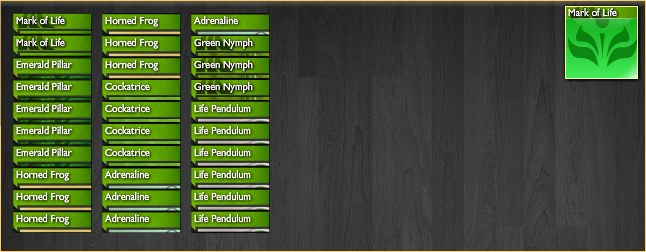
Usage #2: Higher attack creatures with more durability
Outside of lower Attack creatures, more expensive creatures with 7 or 8 Attack points make excellent Adrenaline targets in decks that can afford to wait for the extra quanta generation to take place. In unupgraded play such cards include Phoenix (though it benefits much more from the effects of a Green Nymph than Adrenaline/Epinephrine itself due to its fragility) and Graboids/Shriekers. For upgraded cards, suitable targets include Elite Chargers, Archangels, and Massive Dragons, all three of which typically have enough HP to more readily look over Adrenaline's weakness to CC.
Phoenix | This deck features two creatures which resilient to CC, Green Nymphs and Phoenix. As previously mentioned, though Adrenaline does work well on Phoenix as its 7 Attack yields an ideal damage boost of 8 points, because the effect is lost every time the Phoenix dies and is then Rebirth'd, it is more desirable to use Phoenix in conjunction with Green Nymphs who can otherwise reapply the Adrenaline every time that it is removed. Phoenix are notably hard to remove from the field as they effectively require 2 sources of CC to be used in order to remove for good, excluding some cases such as Liquid Shadow or Overdrive. | Green Nymph |
Titan | AdrenaTitans is a deck which has been used by Team Life in many, many Wars up to this point. Though it is not the most consistent or reliable deck, its ability to shrug off almost all forms of CC while also being able to ignore shields is something that can be quite useful to Life's other cards, especially when considering that in either its upped or unupped form, Titan is an ideal target for Adrenaline usage. In addition, its high HP stat makes it a suitable target for Gravity Pull in the event that the match becomes of a rush versus rush type of mirror match. Massive Dragon can be used to similar effect but while it is more consistent to play, it obviously comes at the price of lacking Momentum and of being much more expensive to play. | Massive Dragon  |
Graboid | This deck was constructed by War 2's Team Life mainly as a means to get in on the Grabbow action, since it seemed like everyone and their mother was using it at the time. The interesting thing is that this Grabbow actually has some good in-element synergy by utilizing the fact that Shriekers are AWESOME Adrenaline targets. It also helps eliminate some of Life's CC weakness by enabling the player to keep their Graboids unevolved until an opportunity arises that makes such a play nearly risk free. | Shrieker  |
Archangel 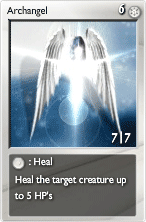 | I'm pretty sure I used this during Trials at some point but I can't recall when that would have been or who it would have been used against. Probably during Master's Tourney. Anyways, this deck utilizes Archangel's ability to self-heal and combines it with yet another 7 Attack Epinephrine sweet spot. As an added bonus, this tactic also allows the user to fall back on Improved Miracle for healing support in the event that rushing doesn't go as planned. This also makes decking out the opponent more of a possibility. | Improved Miracle  |
Elite Charger | Bringing this deck back for a second to emphasize the Chargers aspect a bit more. While it's true that Epinephrine can be used on Scorpions to good effect, it is also equally true that it has fantastic merit on Chargers, increasing their total damage to 15 per turn with a shield bypass ability. Additionally, Chargers can soak up a bit more damage and can escape the kill range of a good number of CC. If Unstoppable is used on a Charger, then this increases its total damage to 17 per turn with Epinephrine while allowing the Charger to escape even more CC. | Unstoppable  |
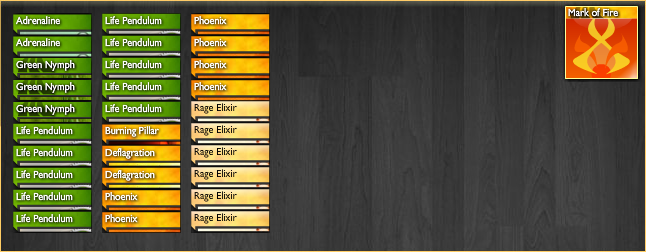


Card 2: Mitosis


Mitosis oftentimes finds its place alongside Adrenaline as a powerful damage booster in Life's arsenal. While Adrenaline can be seen as a more rapid damage increase, Mitosis is oftentimes slower but yields substantially more ramp damage if not dealt with quickly. Similar to Adrenaline, Mitosis finds itself acting most efficiently with creatures that are either low in cost with high attack and/or powerful effects, or creatures that are more durable and are able to take more hits. Such targets include Pests, Rays of Light, Giant Frogs, Vanadium Wardens, Crusaders, and Emerald Dragons. Usage #1: Cheap creatures with Abilities
Lower cost creatures have the benefit of potentially changing the flow of the game more quickly in the absence of creature control while more expensive creatures come out later but if used correctly can stick around on the field and continue to generate more and more damage dealers. Which of the two strategies is best for using this card is mainly dependent on what supporting cards are used to allow Mitosis to be used effectively. In some cases it's simply better to throw caution to the wind and attempt to spawn as many creatures early on as possible, while other times it's better to make use of cards such as Silence and Cloak for protecting creatures from CC.
Devourer | Another deck featured in the most recent War (http://elementscommunity.org/forum/round-3-248/(life-tinkerer)-willng3-3-0-(aether-gen)-zawadx/msg1210564/#msg1210564), Devtosis differs from its Adrenaline variant(s) by primarily focusing on swarming the field with Devourers, completely draining the opponent's available quanta, and using Bonds in combination with the large amounts of creatures on the field to keep any creatures that are played before the lockdown occurs from depleting the player's HP. By far the best part of the Devourer + Mitosis combination is the fact that because Devourer's ability to drain quanta is Passive, Mitosis can be played on it without removing its quanta draining capabilities. Though Cloak can be used for extra protection in this scenario, it may not be necessary, especially if the Devourers are upgraded into Pests. Because this deck is quite passive, Black Dragons are viable options considering that the player has ample time to build up quanta until the Dragons can be played without fear of CC. Drain Life can also be used in this scenario, though Black Dragons usually are more effective with Mitosis. | Black Dragon  |
Ray of Light | Revisiting this deck yet again to more closely inspect the synergy it uses involving Mitosis. With Mitosis, the Rays of Light in this deck can avoid certain death by having one RoL continually spawn more and more RoL to the field unless stopped. This allows the deck to take advantage of great synergy with Hope in the meantime. This combination could also incorporate the use of Feral Bonds but truthfully such a tactic is not needed with the defensive capabilities that this deck already provides. | Hope  |
Vanadium Warden  | For this next deck, we see a full-blown stall which utilizes the delay capabilities of Wardens in order to keep damage off of the player for the rest of the game with the help of Mitosis. Vanadium Warden's 6HP allows it to absorb enough CC to allow it to spawn more of itself, which continually adds to the ability to delay creatures on the opponent's side of the field. But it is obviously impractical to continue to have to do this for the entirety of the game, which is where Thorn Carapace comes into play. The player simply needs to allow an opposing creature to become infected with one counter before using Wardens to seal it off until it dies from the poison damage. Empathic Bonds are also certainly viable in place of Heals, but may not provide enough healing to survive in the early to mid-game. | Thorn Carapace  |
Giant Frog  | And of course one of the simplest tactics to use with Mitosis is to just rush like hell using low cost creatures from one element. As can be expected, this deck utterly fails against decks utilizing Dimensional Shields, Wings, or copious amounts of creature control, but can be utterly devastating otherwise. As opposed to the standard Mono Life rush, simply dealing with one creature in this case isn't always enough to end the swarm of creatures breathing down at your HP bar and the creatures can spawn fast enough here to where that possibility is very, very real. | Elite Cockatrice  |
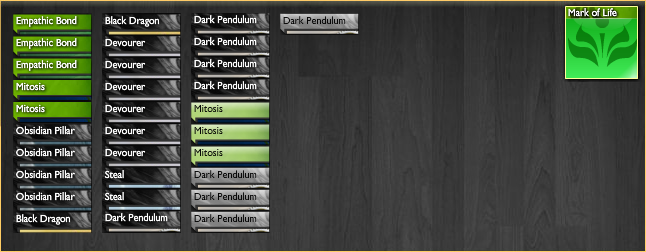
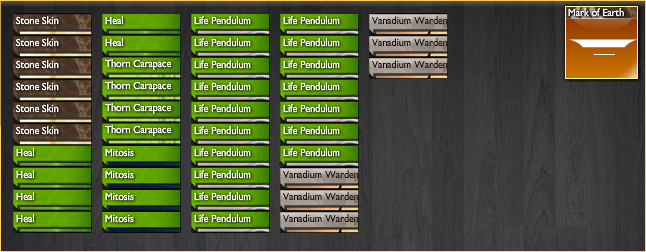
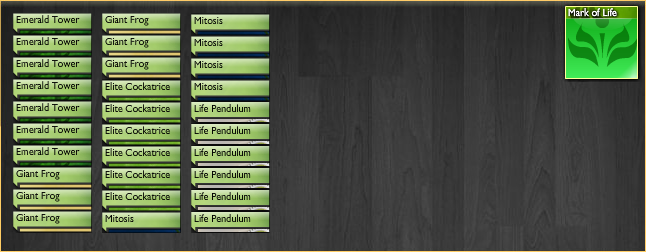
Usage #2: More expensive creatures with higher Attack
As mentioned previously, another viable usage of Mitosis is to combine it with more expensive creatures that are considered stronger and also more durable. More expensive creatures will need ways to mitigate damage in the early to mid game, which may make cards such as Heal, Stone Skin, Miracle, Sanctuary, and Dimensional Shields very desirable.
Crusader  | And once again we find ourselves returning to look at the synergies involved in this deck, this time more closely inspecting the strategies involved between Crusaders and Mitosis. While sometimes it is perfectly viable to wait to spawn more and more RoL in order to guard your HP using Hope, having extra HP early on in the event of unexpected rushing is never a bad idea. To account for this, we have Crusaders providing the bulk of the extra healing in conjunction with Jade Staff. But sometimes it's not enough to have a few Crusaders scattered about and there are also other times where Epinephrine needs to be used on Rays of Light over Crusaders to avoid quanta starvation. Therefore in these circumstances it may be best to start spawning more Crusaders using Mitosis in order to continually Endow Jade Staves and continually raise the player's HP. Upgraded Crusader may be within Lightning range at first, but once it Endows a weapon it becomes a very good target of Mitosis by absorbing more than 1 form of CC under most circumstances. | Jade Staff |
Steel Golem 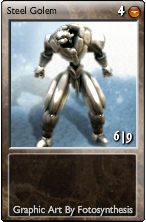 | Rather than explain what amazing synergy is applicable for this deck, it's probably best to point out that this style of deck can be used for nearly any creature with similar stats and cost. Other examples may include Abyss Crawlers, Archangels, and Elite Chargers. In most cases these decks will find themselves slowing down the opponent's offense while gathering up resources to swarm the field with the creatures of choice. | Archangel |
Emerald Dragon  | Sometimes it's best to forgo complex strategies and just go for a deck which is a literal one trick pony. In this deck, the fact that Emerald/Jade Dragons have an abnormally large amount of HP (with respect to the other dragons) is used in order to continuously generate absurd amounts of quanta to generate as many Dragons as possible. They won't be easy to defeat and they can swarm the field unexpectedly fast. A Chimera can also be worked in with a Gravity mark and Emerald Pillars as a form of shield bypass, as otherwise this deck struggles versus Dimensional Shields. However, the deck will find itself unable to handle the speed of almost all pure rushes. | Jade Dragon  |
Card 3: Rustler

Behold! 'Tis Rustler, the adorable, hardworking Life mascot. When not serving its main role as a bench warmer, Rustlers can be used for the purpose of granting explosive Life quanta generation, which can potentially lead to some pretty overwhelming swarming and/or rushing tactics. However, the biggest and most obvious problem of expecting such a strategy to work is that Rustlers are quite squishy, which becomes a very serious issue when also adding in the fact that Rustlers need to survive a turn in order to be able to make use of their ability at all. At times it is possible to use other creatures as bait to allow for a Rustler to enter the field unscathed, but oftentimes the creatures being sacrificed are the ones that a Rustler needs to use its ability to play and be of most benefit to the user. And unfortunately there isn't much of a way of getting around this problem. Because Rustler's ability practically demands that a duo deck be played from the start, it's hard to work in a third element that would allow for more protection for the aspiring little dragons. However, there are some strategies where Rustlers and Leaf Dragons can be viable and of use. Nova | This deck (http://elementscommunity.org/forum/trio-quartet/fun-pillarless-speed-deck-'the-creation-of-life'/) makes good use of the fact that Rustlers can be played quickly and easily at the start of most games using one Nova in order to attempt to swarm the field with Emerald Dragons, with the additional assistance of Adrenaline'd Fireflies. Similar strategies that utilize Rays of Light can be used to similar effect by mass producing Light quanta to prepare the way for a Rustler to convert that quanta shortly thereafter. These tactics can work when not expected simply because some opponents may target down an Adrenaline'd Firefly or Ray of Light, thinking they are a bigger threat than the Rustler hiding in the player's hand, if the opponent even has enough time to draw and play that CC to begin with. Rustlers can less commonly also be used in Life-based Grabbows, where they can be used in instances of quanta deficits (http://elementscommunity.org/forum/round-5-250/(life-lt-)-willng3-3-1-(darkness-tinkerer)-rapidstar_/) in order to allow for low-cost Life cards to be played quickly and easily using quanta that is otherwise usually unused while also dealing a bit of chip damage. | Firefly |
Immolation | On the subject of fodder, another Nova-based tactic is to use Rustlers as targets for Fallen Druids in order to potentially generate absurdly powerful mutants for absurdly low costs. In this scenario Rustlers can also be used as decoys to prevent the Druids from being sniped with CC early in the game. In both of the latter deck examples, the fact that Rustlers are quickly removed from the field at a time of the player's choosing circumvents their CC weakness, though it also may remove the potential benefit of using its ability as well. | Fallen Druid  |
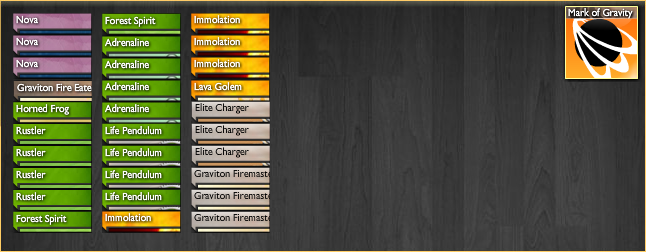
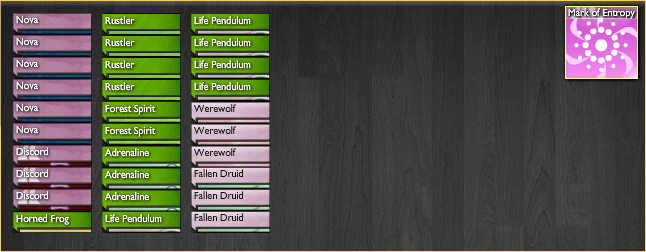
Post by: Afdarenty on June 01, 2016, 02:20:40 pm
Mastering the Cards
I have decided to do a Spell, a Permanent, and a Creature.
Miracle, the backbone of stalls everywhere. Every stall deck, from THE DECK to Firestall, will have Miracle somewhere in it's card list. The most effective way to use Miracle is to simply use it the turn before your opponent can kill you, in most situations. You want to make the best of the hefty 15 (or 12) quanta that you spend to gain the (almost!) full heal from Miracle, so you soak up as much damage as possible beforehand. However, in situations where your opponent can burst you down (Fractal, Parallel Universe, Bolt spells), you will want to be more heavy handed in your usage. During a match, you can do some mental (or use a calculator, I won't judge ;)) math to figure out roughly how much damage your opponent can do in a turn, and time your Miracle accordingly. Cards that pair well with Miracle include Sanctuary, to protect your quanta (and your ability to play Miracle in the first place, by blocking Silence), Stone Skin, to raise your maximum HP to gain the most out of your Miracle, and Sundial, to prolong the amount of time needed before you play Miracle.

Miracle's right hand man, Sanctuary. Those two cards go hand in hand in the stall archetype; there's rarely a deck that doesn't have one or the other, and for good reason! When you look at raw numbers, Shard of Gratitude with a :life mark looks a lot better than Sanctuary, but the difference is all in the card text. Sanctuary prevents your opponent from altering your quanta pool via cards like Devourer, Discord, Black Hole, and additionally prevents alterations to your hand, via cards like Silence and Nightmare. The best way to use Sanctuary is to simply, just.. use it! Sanctuary is a very non-interactive card, it heals you for 4 HP at the end of your turn, and protects your resources. It's best fit is into a stall deck, generally alongside Miracle, to produce copious amounts of healing to sustain your opponent's damage and end the game through one of your deck's wincons. Three cards that work well with Sanctuary are Miracle, for aforementioned reasons; CC cards such as Rage Potion, to eliminate enemy creatures and let you heal up, and Sundial, to buy you more time to gain more HP.
One of Light's most interesting cards, Crusader, is also one of the most versatile! It can Endow weapons such as Titan or Fahrenheit for a sheer boost in attack, for a rush, or weapons such as Eternity and Eagle's Eye to control the flow of the game, and even cards like Jade Staff and Vampire Dagger, to gain some nice healing, for a stallier deck. The best way to use Crusader is to place it in a deck where it can use a weapon's ability to further it's usefulness on the field, such as Vampire Dagger, which provides +6 damage and the Vampire ability, or Eagle's Eye, where you can use Sniper more times per turn. An interesting interaction with Crusader, is that if you make a weapon a creature via Flying/Animate Weapon, buff it via Chaos Power, Blessing, Rage Potion, etc., and then Endow it, the attack buff transfers to the Crusader, creating a Crusader with a punch! Three cards that have the most synergy with Crusader are Flying Weapon, to make buffs transferable, Blessing, the buff to transfer, and Vampire Dagger, a very strong card to Endow.
I have decided to do a Spell, a Permanent, and a Creature.
Miracle, the backbone of stalls everywhere. Every stall deck, from THE DECK to Firestall, will have Miracle somewhere in it's card list. The most effective way to use Miracle is to simply use it the turn before your opponent can kill you, in most situations. You want to make the best of the hefty 15 (or 12) quanta that you spend to gain the (almost!) full heal from Miracle, so you soak up as much damage as possible beforehand. However, in situations where your opponent can burst you down (Fractal, Parallel Universe, Bolt spells), you will want to be more heavy handed in your usage. During a match, you can do some mental (or use a calculator, I won't judge ;)) math to figure out roughly how much damage your opponent can do in a turn, and time your Miracle accordingly. Cards that pair well with Miracle include Sanctuary, to protect your quanta (and your ability to play Miracle in the first place, by blocking Silence), Stone Skin, to raise your maximum HP to gain the most out of your Miracle, and Sundial, to prolong the amount of time needed before you play Miracle.
Miracle's right hand man, Sanctuary. Those two cards go hand in hand in the stall archetype; there's rarely a deck that doesn't have one or the other, and for good reason! When you look at raw numbers, Shard of Gratitude with a :life mark looks a lot better than Sanctuary, but the difference is all in the card text. Sanctuary prevents your opponent from altering your quanta pool via cards like Devourer, Discord, Black Hole, and additionally prevents alterations to your hand, via cards like Silence and Nightmare. The best way to use Sanctuary is to simply, just.. use it! Sanctuary is a very non-interactive card, it heals you for 4 HP at the end of your turn, and protects your resources. It's best fit is into a stall deck, generally alongside Miracle, to produce copious amounts of healing to sustain your opponent's damage and end the game through one of your deck's wincons. Three cards that work well with Sanctuary are Miracle, for aforementioned reasons; CC cards such as Rage Potion, to eliminate enemy creatures and let you heal up, and Sundial, to buy you more time to gain more HP.
One of Light's most interesting cards, Crusader, is also one of the most versatile! It can Endow weapons such as Titan or Fahrenheit for a sheer boost in attack, for a rush, or weapons such as Eternity and Eagle's Eye to control the flow of the game, and even cards like Jade Staff and Vampire Dagger, to gain some nice healing, for a stallier deck. The best way to use Crusader is to place it in a deck where it can use a weapon's ability to further it's usefulness on the field, such as Vampire Dagger, which provides +6 damage and the Vampire ability, or Eagle's Eye, where you can use Sniper more times per turn. An interesting interaction with Crusader, is that if you make a weapon a creature via Flying/Animate Weapon, buff it via Chaos Power, Blessing, Rage Potion, etc., and then Endow it, the attack buff transfers to the Crusader, creating a Crusader with a punch! Three cards that have the most synergy with Crusader are Flying Weapon, to make buffs transferable, Blessing, the buff to transfer, and Vampire Dagger, a very strong card to Endow.
Mastering the Cards (Trials I)
https://docs.google.com/document/d/1ABh6DQK-S3AMvHFHL5t6Z0mANvVDYWmAUkxiLxwAAvY/edit
https://docs.google.com/document/d/1ABh6DQK-S3AMvHFHL5t6Z0mANvVDYWmAUkxiLxwAAvY/edit
Mastering the Cards
Ghost of the Past
-Generally speaking, Ghost of the Past is the main 'mid-hitter' for Time, although its price can be somewhat expensive compared to other creatures found in the alternate elements.
The major attribute of this card is from its passive, 'Obsession', which deals 10 (or 13 if upgraded) damage to its owner upon being discarded from the hand. In this case, a player should work their decks to have sufficient quanta in order to play Ghosts rather than discard them, or at least ensure that they aren't forced to discard any if their hand is full with vital card combinations.
The most obvious combination card to pair up with Ghost of the Past is Nightmare; by playing a Ghost of the Past and immediately targeting it with a 2 (or 1) :darkness quanta cost Nightmare, the opponent's hand will be filled with Ghosts, which will deny their next draw as well as potentially forcing them to discard a card if they still don't have enough quanta to play their other spells, creatures, or permanents. In addition, depending on many Ghosts enter your opponent's hand, you'll be healed a significant amount due to Nightmare's healing effect.
Of course, expert players who see a Darkness mark and time quanta on your board may withhold from playing cards in order to avoid a forced discard. Additionally, Ghost of the Past has only 4 HP for both versions, making it susceptible to hard CC such as Shockwave and Lightning, and can be killed or stopped by several enemy CC effects depending on the element being faced.
Ghostmare is a fairly popular denial deck that many Time players use against non-Time users, due to its efficiency. Other cards, such as Fractal and Dimensional shield, can create a 'Ghostal' deck that utilizes stalling tactics and massive amounts of time and aether quanta to overwhelm an enemy with sheer numbers, while Precognition and Golden Nymph allow for a more focused build when mixed together in a mono-Time.
Reverse Time
-Given its cheap cost and simply efficiency at what it does, removing creatures off of either player's field (mainly the enemy's though), can be better than doing straight up damage.
Unlike other creature control cards, Time's spell simply removes a creature and places it back on the top of the owner's deck, essentially 'killing' it, while also reviving it for its owner to play again if possible. As a player must spend the same amount of quanta again in order to replay a creature that is Rewound, this can force opponents into deciding whether or not a creature is worth replaying again, especially if they need other cards in their deck to draw and play.
While Eternity, the rare weapon for Time, uses Reverse Time as an ability, most players do not mix the two. In spell form, Reverse Time is more effective with other spells, such as Earthquake, which can topple pillars and pendulums, causing a shortage of essential quanta to an enemy. Mixing the two can make it extremely frustrating to foes who are pressured into deciding whether to play the creature again for damage/utility, or hold it off in the hopes that they can draw additional pillars/pendulums to stabilize their quanta sources, alongside drawing other cards to adapt to the denial tactics.
Immortal (and Burrowed) creatures can often laugh at Reverse Time as a whole due to its inability to effect untargetable creatures; Cloak in particular, can make it impossible for a Time player to use many denial tactics and combos unless they also have Permanent control. Because of this, players who often expect Reverse Time will either hold off cards repeatedly in order to play them all at once (thus, making it hard to Rewind them all unless you have multiple spells), or use specific combinations to stop the instant removal, such as Quintessence to prevent creature targeting.
Reverse Time is also found in Ghostmare decks due to its simple elegance with Nightmare, and can be snuck into several other decks due to its cheap cost. Several Supernova-based speedbows often have this deck as quick CC if fast-damaging cards such as Lightning can't kill the creature, or if Freeze can't prevent a creature's potential efficacy on the field.
Pharaoh
-Despite the rarity, Pharaohs are an awesome stall breaker (in most cases) and long-term investment for building up a formidable army of scarabs - not just for damage, but also for creature control if you can spare the gravity quanta.
Similar to Firefly Queen, Pharaohs are a pure mono-Time quanta-loving creature that can summon a plethora of Scarabs, acting (and looking) as a leader of a oncoming army. Scarabs have 2 (or 3 if upped) ATK and have variable HP levels depending on the number of Scarabs in play, alongside whether or not any Scarab was boosted or damaged in the health department. Pharaohs are costly creatures (9 :time quanta with a 2 :time ability cost), making them very expensive, but well worthwhile if a player has the required resources.
As Scarabs themselves are powerful due to their swarming tactics alongside their ability to devour other creatures (their Devour ability), many players will often seek a relationship between Time and Gravity in order to maximize the profit of a Pharaoh-based deck. The amount of Scarabs produced is reliant not only the amount of quanta, but also whether or not a Pharaoh can use its ability to the fullest in a match. Thus, cards such as Shard of Readiness can be used to quickly summon Scarabs onto the field if applied to a Pharaoh (while also removing the cost of the ability for future uses). Alternatively, Quintessence can be used to protect the Pharaoh from being killed or targeted by nasty creature control effects, and Chimera (utilizing Gravity quanta again) can serve as a last-ditch attempt kill the enemy if there are annoying shields blocking your Scarabs from consuming your prey.
Pharaoh decks are for the most part slow, making them easy to recognize and combat if an experienced player foresees them coming in battle. Control cards, such as Freeze and Basilisk Blood can stop a Pharaoh for several turns from making an army, while denial cards, such as Discord and Devourer can be equally annoying if you don't have the sufficient quanta to play the rare card (or summon Scarabs). Of course, most players will simply have faster decks or ways of dealing alternate damage to ignore Pharaohs from affecting them at all.
Mastering the Cards
Water's card pool is one of the most diverse and interesting in the World of Elements, with five separate direct synergies with other elements. Lets take a look at three of those dual element cards now.
Chrysaora / Physalia
(http://elementscommunity.org/images/Cards/Chrysaora.png)(http://elementscommunity.org/images/Cards/Physalia.png)
Usage
This little critter is unique in the game as the only creature capable of dealing poison counters directly to an enemy without having to deal damage. If unanswered, it can slowly but surely whittle an opponent's health down regardless of any shielding or Sundials. Interestingly, the upgraded version is sometimes less effective, as it can be damaged by Fire Shields and Spine Carapaces.
Another use for these cards is as in-element Shard of Patience fodder. As it only costs 1 :water, it can fill a creature slot cheaply and effectively in certain formats where you are required to have a certain percentage of cards in element.
Decks
This deck focuses on dealing many poison counters as quickly as possible. Physalia can be run off the mark, only costing 1 :water initially, and Bonewalls and Congeals can be used to simply delay the opponent's offensive strategies while you rack up poison counters.
This is an interesting deck. Shard of Patience is designed to take your squids and Chrysaora out of CC range, and slowly reach a point where you can burst the Shard of Patience, having whittled their health down with poison from the Chrysaora, and kill your opponent in the same turn. The interesting part comes with Aflatoxin. By killing your first Chrysaora with Aflatoxin, Malignant Cells will flood your field, meaning your later played water creatures can be, if timed right, played in Flooded Areas, your Shard of Patience will allow you to reach a killing blow extremely quickly. Alternatively, play Aflatoxin on one of your opponent's creatures, and use flooding to completely shut down their ability to play creatures.
Toadfish / Puffer Fish
(http://elementscommunity.org/images/Cards/Toadfish.png)(http://elementscommunity.org/images/Cards/PufferFish.png)
Usage
These creatures are a strange pair, and one whose function differs dramatically between the Upgraded and Unupgraded versions. Toadfish are one of the best unupgraded creatures for damage to cost ratio in the game, and can be used either simply as vanilla creatures, or if you have access to air quanta, a decent CC threat to your opponent. Puffer Fishes on the other hand are the most durable Venomous creatures in the game, with the added bonus of extra raw power. Being at 3 attack makes them perfect as an Adrenaline target. AdrennaPuffers deal 12 raw damage per turn and inflict 2 poison counters to boot!
Decks
This is a funky little deck which addresses problems in two deck archetypes. Decks that focus simply on Adrenaline and Pufferfish sometimes take too long to set up, and can be beaten by rushier decks, while Adrennastaves sometimes suffer from having not enough damage potential, easily being walled or healed through. With this deck, you'll be trying to get an Adrennastaff out quickly against faster decks, and if you don't need the early healing, a faster AdrennaPuffer can set you up with early poison counters which will slowly take your opponent down as you heal through their offense. (Note. Staves are unupgraded because this allows an extra 5hp healed because Adrenaline gives an extra attack at 2 damage compared to 4 damage.)
This Domination-style deck is designed to frustrate your opponent by preventing his creatures from damaging you, while killing off the ones that can. Wings work for even longer that Dimensional Shields, but flying creatures can still damage you. The Owl's Eyes and Toadfish can focus their CC on flying creatures, while ignoring grounded creatures which are walled by Wings. Dragons are a good back-up damage, because if your Wings are stolen, you'll be able to hit through it.
Steam Machine / Steam Machine
(http://elementscommunity.org/images/Cards/SteamMachine.png)(http://elementscommunity.org/images/Cards/SteamMachineUpgraded.png)
Usage
Steam Machines have the potential to be the most dangerous creatures in the game. Unchecked, and with enough quanta, they can grow at an alarming rate, and due to having high HP they can act as excellent stall-breakers in the right scenario. They can be slow to start, however, so need the right support to allow them to flourish. The Upgraded version also has a rather strange niche: other than Armagios, they are the highest HP creatures that can be targeted by Butterfly Effect.
Decks
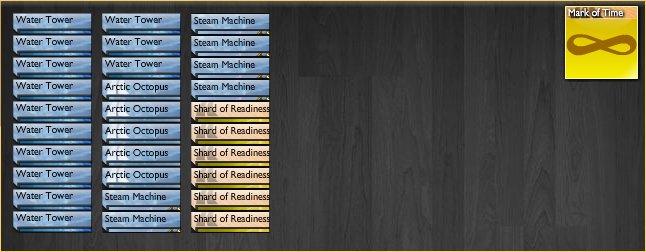
Steam Machines take a huge amount of quanta to fuel properly, so in this deck Shard of Readiness is used to cut the necessity for a Fire quanta split. This allows you to get Arctic Octopuses out much quicker, and be far freer to use their abilities.
This is a very similar idea, but the fire splash gives you access to PC which can be vital in getting through shields, or destroying dangerous weapons such as Lobotomizer. The extra necessary quanta means you have more constructs, so late game, a Nymph Queen (or Nymph Tears) can give you an alternative stallbreaking tactic.
BONUS DECK
Remember how I said water has the most dual-element cards in the game? Well, say hello to...
Well, this utilizes all of Water's dual cards, plus Forest Spirits from Life which have a Water ability (intentionally unupgraded so they can be played with only one SuperNova). It is a balanced domination deck with elements of denial from Poseidon, CC and Ability control from Toadfishes and Ulitharids, and PC from Steal and Butterfly Effect (which can be played either on the Steam Machine, or on Physalia after your Death quanta has been used up.
Water's card pool is one of the most diverse and interesting in the World of Elements, with five separate direct synergies with other elements. Lets take a look at three of those dual element cards now.
Chrysaora / Physalia
(http://elementscommunity.org/images/Cards/Chrysaora.png)(http://elementscommunity.org/images/Cards/Physalia.png)
Usage
This little critter is unique in the game as the only creature capable of dealing poison counters directly to an enemy without having to deal damage. If unanswered, it can slowly but surely whittle an opponent's health down regardless of any shielding or Sundials. Interestingly, the upgraded version is sometimes less effective, as it can be damaged by Fire Shields and Spine Carapaces.
Another use for these cards is as in-element Shard of Patience fodder. As it only costs 1 :water, it can fill a creature slot cheaply and effectively in certain formats where you are required to have a certain percentage of cards in element.
Decks

This deck focuses on dealing many poison counters as quickly as possible. Physalia can be run off the mark, only costing 1 :water initially, and Bonewalls and Congeals can be used to simply delay the opponent's offensive strategies while you rack up poison counters.
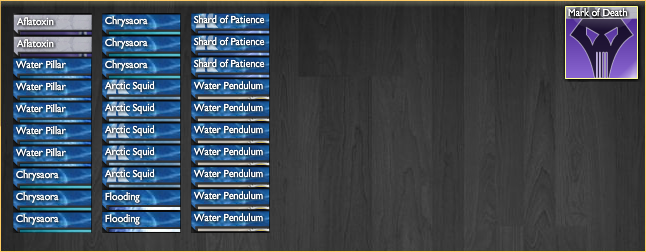
This is an interesting deck. Shard of Patience is designed to take your squids and Chrysaora out of CC range, and slowly reach a point where you can burst the Shard of Patience, having whittled their health down with poison from the Chrysaora, and kill your opponent in the same turn. The interesting part comes with Aflatoxin. By killing your first Chrysaora with Aflatoxin, Malignant Cells will flood your field, meaning your later played water creatures can be, if timed right, played in Flooded Areas, your Shard of Patience will allow you to reach a killing blow extremely quickly. Alternatively, play Aflatoxin on one of your opponent's creatures, and use flooding to completely shut down their ability to play creatures.
Toadfish / Puffer Fish
(http://elementscommunity.org/images/Cards/Toadfish.png)(http://elementscommunity.org/images/Cards/PufferFish.png)
Usage
These creatures are a strange pair, and one whose function differs dramatically between the Upgraded and Unupgraded versions. Toadfish are one of the best unupgraded creatures for damage to cost ratio in the game, and can be used either simply as vanilla creatures, or if you have access to air quanta, a decent CC threat to your opponent. Puffer Fishes on the other hand are the most durable Venomous creatures in the game, with the added bonus of extra raw power. Being at 3 attack makes them perfect as an Adrenaline target. AdrennaPuffers deal 12 raw damage per turn and inflict 2 poison counters to boot!
Decks
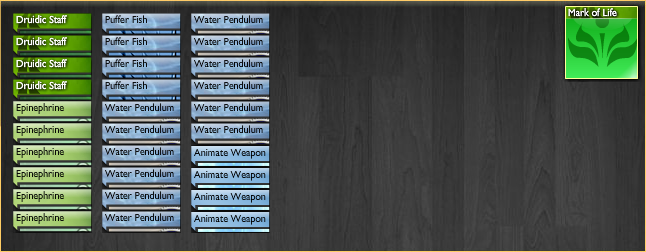
This is a funky little deck which addresses problems in two deck archetypes. Decks that focus simply on Adrenaline and Pufferfish sometimes take too long to set up, and can be beaten by rushier decks, while Adrennastaves sometimes suffer from having not enough damage potential, easily being walled or healed through. With this deck, you'll be trying to get an Adrennastaff out quickly against faster decks, and if you don't need the early healing, a faster AdrennaPuffer can set you up with early poison counters which will slowly take your opponent down as you heal through their offense. (Note. Staves are unupgraded because this allows an extra 5hp healed because Adrenaline gives an extra attack at 2 damage compared to 4 damage.)
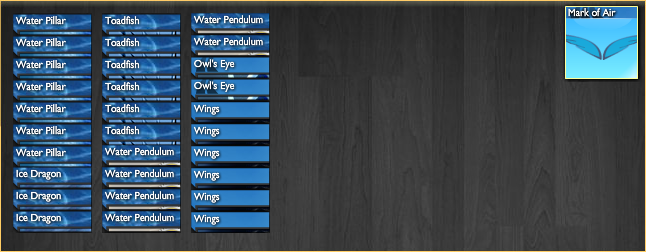
This Domination-style deck is designed to frustrate your opponent by preventing his creatures from damaging you, while killing off the ones that can. Wings work for even longer that Dimensional Shields, but flying creatures can still damage you. The Owl's Eyes and Toadfish can focus their CC on flying creatures, while ignoring grounded creatures which are walled by Wings. Dragons are a good back-up damage, because if your Wings are stolen, you'll be able to hit through it.
Steam Machine / Steam Machine
(http://elementscommunity.org/images/Cards/SteamMachine.png)(http://elementscommunity.org/images/Cards/SteamMachineUpgraded.png)
Usage
Steam Machines have the potential to be the most dangerous creatures in the game. Unchecked, and with enough quanta, they can grow at an alarming rate, and due to having high HP they can act as excellent stall-breakers in the right scenario. They can be slow to start, however, so need the right support to allow them to flourish. The Upgraded version also has a rather strange niche: other than Armagios, they are the highest HP creatures that can be targeted by Butterfly Effect.
Decks
Get On Up, It's Steaming Time
Hover over cards for details, click for permalink
Deck import code : [Select]
Steam Machines take a huge amount of quanta to fuel properly, so in this deck Shard of Readiness is used to cut the necessity for a Fire quanta split. This allows you to get Arctic Octopuses out much quicker, and be far freer to use their abilities.

This is a very similar idea, but the fire splash gives you access to PC which can be vital in getting through shields, or destroying dangerous weapons such as Lobotomizer. The extra necessary quanta means you have more constructs, so late game, a Nymph Queen (or Nymph Tears) can give you an alternative stallbreaking tactic.
BONUS DECK
Remember how I said water has the most dual-element cards in the game? Well, say hello to...
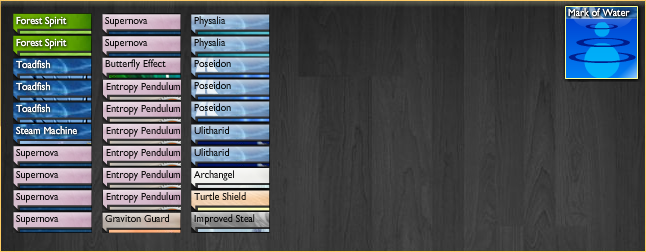
Well, this utilizes all of Water's dual cards, plus Forest Spirits from Life which have a Water ability (intentionally unupgraded so they can be played with only one SuperNova). It is a balanced domination deck with elements of denial from Poseidon, CC and Ability control from Toadfishes and Ulitharids, and PC from Steal and Butterfly Effect (which can be played either on the Steam Machine, or on Physalia after your Death quanta has been used up.
Mastering the Cards
Toadfish | Puffer Fish
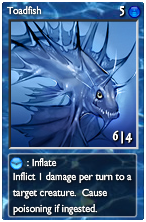
Overview: Mansion of Water ~ Submerge the mind.
They're one of those very few cards whose mechanics changes completely on upgrading. They can both poison stuff, but the stuff they poison are different and they poison those stuff differently as well. This makes the stuff that gives them great support differs as well.
Toadfishes: The Devil's Little Sibling
Toadfishes usually come for two purposes: as Water's efficient midrange hitter (6 attack at 5 Water) or as a repeatable, if slow, creature control. The latter purpose, as well as its 4 HP (which lets them get past Gravity Shield without being roasted by Rain of Fire), still offers it a niche in upgraded decks, where Abyss Crawlers are even more efficient (6 attack at 4 Water) but comes at 6 HP.
For one Air, a Toadfish Inflates on a creature, placing a poison counter on it. You can use them to slowly finish off your opponent's creatures. Thanks to its cheap cost, Mark of Air and a few pendulums can usually sustain ability usage for the entire battle. Good helps for Toadfishes spreading disease includes cards that delays their target (Arctic Squids and Freeze are good examples) and cards that deals instant damage to a creature (Shockwave and Ice Bolt works well for this, the former helps reinforce Air-Water synergy).
Of course, you're free to throw all subtlety to the wind, pun very much intended (especially if you're using them in decks without Air sources), and still get an efficient and durable midrange attacker. With possible non-Air companions ranging from Nymph's Tears, Nightmare, Basilisk Bloods, and beyond, the possibilities are almost as deep as the sea itself.
Finally, it should be noted that while it's Puffer Fishes that normally poisons the opposing player, a Toadfish can also technically poison the opposing player by having the Toadfish Inflate on a Voodoo Doll. The entire thing rarely happens, however, since that will require at least a trio (Toadfish hails from Water, Voodoo Doll hails from Darkness, and Inflate requires Air).
Puffer Fishes: Eternally Cunning Azure Moon
Puffer Fishes, on the other hand, comes with poison coated on their attack, inflicting one poison counter on the opposing Elemental upon attacking. They don't seem to be more dangerous than a Toadfish due to their 3 attack, and yet a few of them will steadily stack up poison counters on an unshielded enemy. Also, while Toadfishes requires Air to work its Inflation wonder, Puffer Fishes might as well throw all subtlety to the wind since their poison works innately and automatically.
As such, they are usually found on decks where piling poison counters are at least a secondary objective. Notable companions on decks where stacking those poison a primary objective includes Physalia, Poison, and Arsenic. Adrenaline also deserves a mention: casting one on a Puffer Fish will let it inflict 12 damage per turn (shields notwithstanding) and two poison counters. (But pray your enemy doesn't deploy shields with on-attack effects, lest the hastened Puffer Fishes will quickly overextend themselves! XP)
For decks where stacking those poison a secondary objective though, ... true, they seem to have a broader array of options, at least compared to other poison-inflicting creatures. Like Life's Scorpion, a Puffer Fish doesn't need a buff to stick their poison. They also pierce shields the best among poison-inflicting creatures, buffs notwithstanding. Problem is, like Life, Water has their own share of efficient midrange hitmen that pierces shields better at similar costs, despite not having the poison-on-attack.
True, a 3/5 creature that can poison a player might seem exiciting in paper, but there are some reasons why Puffer Fishes, like Life's Scorpions, don't see much action. The two are relying on their poison to do most of their damage, in elements where efficient midrange hitmen are abundant (even Elite Cockatrices, who doesn't see much action themselves due to being outclassed by Giant Frogs, are more efficient than a handful of other element's midrange hitmen) while having their (direct) attack less than their cost. And while Scorpions can probably still be forgiven because their 3 Life cost means you can probably Fractal them early before shields hit the field, good luck getting away with PufferTal and their 5 Water cost. You're probably better off Fractalling Abyss Crawlers (6/6 for 4 Water) or even Toadfishes (6/4 for 5 Water).
Nymph's Tears | Nymph's Tears
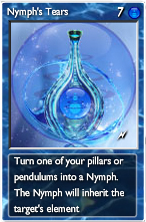
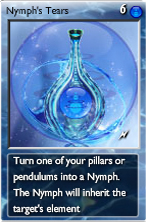
Overview: Starting Your Own Institutional Racism
Normally, Nymphs are a treasure cannot be bought with electrum or rolled in the spins. They can only be acquired from the Oracle, winning PvP-related events organized by the Forum, or generous donations to sustain the Forum. For the rest of us, can we dream of commanding a Nymph? Nevermind just dream, you can actually do it. For the cost of a pillar and 7 Water (6 Water for upgraded Nymph's Tears), you can temporarily conjure a Nymph that works like any of those usual Nymph cards with Nymph's Tears.
How They Work: Mastering the Racial Profiling
The Nymph created will be related to the pillar or pendulum you made a Nymph out of. Trying to create a Nymph out of a Quantum Pillar/Tower will result in a random nymph, as anyone who have faced Jezebel might have learned. Creating one from a Mark card, which is even more scarce than a Nymph (since the Oracle won't give you one), will surprisingly generate a random Nymph as well. The card being upgraded will also decide if you'll get upgraded or unupgraded Nymph.
For example, casting this on an Emerald Pillar will get rid you of the pillar, but gives you a Green Nymph in exchange. Casting it on an upgraded Life Pendulum instead will net you a Life Nymph (upgraded Green Nymph). When you cast one on an open Mark of Life, do not expect that you will get a Green Nymph out of it.
Where They are Found: Building the Racist Ideology
These alchemical spells are often found red-handed (or, rather, blue-handed (http://elementscommunity.org/chat/skin/smilies/silly.png)) among mono-Water rushes looking to overwhelm the enemy with sheer number of Nymph Queens. That does not shut any chance that they appear elsewhere. As a classic patter song put it,
Quote
It draws power from the lands, and it summons the Nymphs fanatical;I mean, there are decks out there that seeks to conjure Blue Nymphs and their vicious Unstable Gas, Golden Nymphs and their enlightening Precognition, even Black and Purple Nymphs and their devious combination of Liquid Shadow and Antimatter, amongst others.
From the Amber to Turquoise, in order categorical. (http://elementscommunity.org/chat/skin/smilies/sillyspin.gif)
Synergies: Aiding the State Racism
Earthquake is a major headache against many NT-based decks. A Cloak will make it easier to protect not only the pillars and pendulums from which the Nymphs are to be created from, but also the Nymphs themselves.
(The other method of protecting your pillars and pendulums, Enchant Artifact, DEFEATS THE ENTIRE POINT OF NYMPH'S TEARS because one cannot make a Nymph from an Enchanted stack of pillars.)
At times, protecting the Nymphs have a higher priority than protecting the pillars from which they came from. For those purposes, there are few options better than casting Quintessence on the Nymph. The only problem left, though, is that they will still be vulnerable to hostile shield effects.
Depending on what other Nymphs you are summoning, other options may also vary. From Shards of Readiness to empower the drawpower from Golden Nymphs, Skull Shields to take cover from Malignant Cells created from Grey Nymphs' Aflatoxin, Solar Shields to help fuelling Light Nymphs' Luciferin, to Immolation to explode Blue Nymphs' Unstable Gases, the options are as colorful as the Nymphs you can create.
Trident | Poseidon

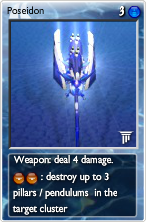
Overview: Seven Lances of the Deep Sea ~ Forgotten Benefit
At a first glance, Trident doesn't seem to be a very destructive weapon. Four damage per turn for three Water does not sound efficient for a weapon. Moreover, Water and Earth don't usually share decks out of rainbow stalls or inferior decks, further explaining their absence. However, just like Time's Eternity, if you are using it, you are not using it for its damage alone. But why I picked Eternity in particular? Look below.
Where They are Found: Tectonic Illusion
You might have noticed that no AI3 enemy wields a Trident (neither does any of them wields Time's Eternity). It's no coincidence that the two, given the quanta they need (some Earth for Trident, and lots of Time for Eternity), will severely thrash weaker decks without giving them much chance to retaliate by denying them vital resources. For a comparison, an Eternity brings severe headaches by rewinding that one creature you have just played over and over and over and over again, forcing you hold your cards if you want to draw anything new from your deck. A Trident, on the meanwhile, brings severe headaches by smashing three pillars at once, quickly hampering their quanta generation and quite likely nullifying their good quanta opening.
Indeed, Tridents are basically Earthquakes on a stick. It's this strong, reusable denial, as well as being a bridge for Water-Earth synergy, that earns it a place in some decks. It's also why they're usually found in Water/Earth decks that seeks to destroy their enemy's quanta production and delay their enemy's key creatures while their own creatures are pounding the enemy.
Synergies: Footprints of Neptune
Basilisk Blood is a good, cheap addition for decks perusing this weapon. That way, not only their quanta generation will come screeching to a halt, but so will their key creatures. It also strengthens the Water-Earth synergy.
Alternatively, an Auburn Nymph can cast those Basilisk Bloods while moonlighting as a tough attacker herself. (While you can summon her naturally, you're probably better off projecting her artificially by Nymph's Tears to get around the high Earth cost from naturally summoning an Auburn Nymph.) This lets you to potentially stop every single creature. The catch, though, is that it can consume Earth very quickly. You will need not to have your Earth quanta dip too low, or you're unable to crack their pillars when you need it.
Losing three early pillars at once is painful enough. Few, however, can compare to losing up to six pillars at once when you launch a Tsunami and cast Earthquake on the opponent's pillars at a single turn, especially if they happen early in the game. The sudden halt on quanta production caused by them can be devastating. By the time they draw their ninth pillar, you're probably well ahead with at least a couple of creatures pounding at them.
Decks with permanent control will quickly hope they can get rid of the Trident once they realize what you are up to with it. After casting Enchant Artifact on it, they're left with few options to protect their pillars. The first is by protecting the pillars themselves, be it permanently (by casting Enchant Artifact on their pillars) or temporarily (by putting up a Cloak). Another way is by getting the weapon delayed (either by freezing the weapon or by getting their Voodoo Doll delayed or frozen).
Being A War Reporter
DrainBolt
Drainbolt is a very versatile deck that was used in War, and proved to be very successful. It does very well against rushes, stallbreaks very well, and does decently against domin decks. 12 CC cards prove very useful for controlling the field.
Against rushes, while CC is used against creatures, hopefully vagger is out to slowly chip away HP and heal yourself. While the quanta scales, you can burst with the CC directly on HP and/or fractal dragons for heaps of damage. OTK at the end of the game is great, and is possible for EM as drains and vagger heal.
Against stalls, it is best to scale quanta as fast as possible, preferrably with vagger out. It is ideal to have Fractal/Dragon/6 Drain life in your hand. Drains can be substituted for lightnings as well. Firstly, directly drain HP, and once that is done, you can fractal dragons for as much damage as possible. If you draw another fractal fast enough, you can have several dragons on the field for heaps of damage.
Against Domins, it is harder to play against. It is ideal to save for enough quanta to kill any creatures, using as less CC cards as possible, for other creatures. You can merge the strategies above to find an ideal way to win against a domin deck.
It has proved useful against many decks, which can be seen from War #9:
Exhibit A (http://elementscommunity.org/forum/round-9/(darkness-lt-)-chrispybacon84-3-1-ginyu-(gravity-gen-)/)
Exhibit B (http://elementscommunity.org/forum/round-3-248/(darkness-upgrades)-chrispybacon84-3-2-cccombobreaker-(entropy-tinkerer)/)
Exhibit C (http://elementscommunity.org/forum/round-16-609/darkness-calindu-(aves)-3-1-air-mrpaper(noobiecakes)/)
All in all, drainbolt is a very versatile deck that has few weaknesses compared to other decks. It has a very adaptive play style and therefore suits many types of decks.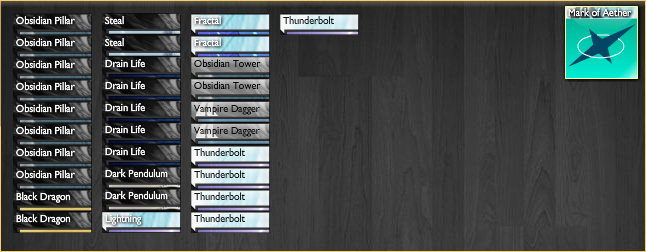
Hello Odii Odsen,
I'm not going to ask you the same questions as a regular interview. This is going to be a much more pvp-oriented interview. Here comes.
Many people consider you as the best master darkness has had. What do you think of this? If you disagree, who would you name as best darkness master?
First of all, you should know that I am a very self-critical person. The biggest challenge for me is to be satisfied with myself. What I learned is that Masters have much more tasks than beeing General in war. I tried to discuss with people on forums and in chat about in-game stuff, also, of course about darkness cards, deck's and strategies. Besides that, I think I made an acceptable performance in war.
TheOnlyRealBeef[/] and [user]Physsion made also a really good work. TorB was a really loyal darkness player who represented and pushed this element with all of his energy. Additionally, he was also Master for three periods. Physsion is a smart guy who understood the shard meta quickly. I never thought about who was the best master of darkness, I think all of us have their specific qualities. This assessment is very subjective but for me there is no "best" master of darkness.
Darkness has had 2 very strong showings in the last 2 wars, 2nd and first respectively, and you were the leader of one of them. What has made darkness suddenly strong? Did the war rules favor you? Did something click in your minds to find new ways to beat the meta? Was it luck?
I don't think darkness became suddenly strong. People finally learned how to use darkness. The main difference between my precursor and me was that I reduced the use of the "classic" decks like Ghostmare and tried to find out new ways with my team mates. (Unfortunately we didn't find a way to beat the Firestall) Rules were also an important aspect. Darkness has a huge advantage in a shard meta IMO. Luck is the one thing, several times having luck is skill.
Unlike the few previous trials, this time around we have a lot of people trialing for darkness. Do you think the recent war results have to do with this?
Yes, I think it has to do with this. But also the fact that darkness became a popular element in other PvP events where shards are allowed.
Out of the challengers, excluding the master, who do you think has the most chances to take the mastership and why?
My honest opinion is that Physsion will have the best chances (even without any bonus points). The person who will face him in the finals is probably ji412jo or Aves. ji4124jo was always one of the challengers favorites because of his deckbuilding skills with darkness. Aves become better and better. I think this could be a close race.
If you were to trial for a non-darkness element, what element would it be?
Definitely Air. Air was always my second favorite element. I like it to build and play decks with the Blue Nymph and I like the synergies with other elements.
You have a lot of PvP experience, and a lot of winning experience. What makes you a superior pvp player to the average?
Its a mix of prediction and the fact that I mostly play decks which can win against the most possible opponents decks.
I have personally had to face your blue nymph cloak deck. It is very strong. How did you get the idea for it? How many codes did you spend to get those nymphs?
Thank you. I came to this idea because unupped Blue Nymphs are not very CC resistant. I needed a way to save them from CC.
Is there one PvP match that you remember as if it were yesterday? One particular match that means more than the others?
Not only one. There were many games and especially matches I remember. Most of them I lost. Maybe this is the reason why I can remember them. I hate to lose.
But one of the positive remembrance is this one:
http://elementscommunity.org/forum/round-5-170/(darkness-gen-)-odii-odsen-3-0-furkanno-(time-lt-)/
Last question for you. Why have you decided to stop defending your mastership?
I like playing war but I don't have the time to be a General. So there is still the rule that you either have to be a General in war or you can not participate (for other elements). It's a good rule btw.
Any last words you would like to say?
Good luck in Trials. I'm glad to see that Darkness became more popular. Maybe I will trial one day again.
Thanks for answering!
NovaSwallow from War 9 (http://elementscommunity.org/forum/round-1-246/(gravity-lt-)-andretimpa-3-1-asdfugio-(entropy-sld-)/)
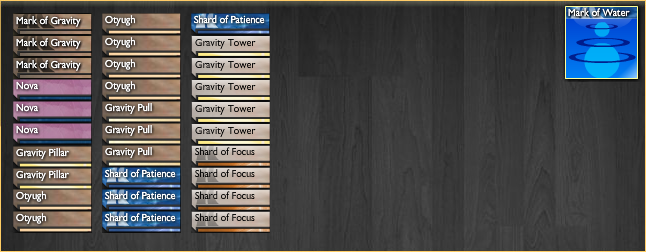
Card by card:
Shard of Patience: This card is what will allow you to build damage to finish your opponents, as well as strenghten your creature control and improve slightly your defense.
Otyugh: even though the deck uses unupgraded otyughs, shard of patience means this is will only give you a slight delay, which is worth it, considering the amount of upgrades you have available. The only exception is when facing aether, as you want your otyughs to be able to survive one lightning in this case, which means you'll have to swap upgrades with your quanta.
Shard of Focus: acts as permanent control (strong enough to disrupt the quanta generation of your opponent) and "healing" because of the combo with gravity pull. In emergency cases it can be used as quanta control by turning it into a black hole.
Gravity Pull: You normally want it in your shards of focus to mitigate the damage you haven't swallowed with your otyughs yet, but if you have spares they sometimes come handy to remove annoying creatures.
Nova: The oddball in the deck. It is there to mitigate quanta denial when facing entropy or darkness and to speed up your shards of patience by 1, sometimes 2 turns, as well as speeding up your first creature.
Strategy:
The central combo in the deck is the combination of otyugh and shard of patience, that not only builds damage, but also HP that makes the otyughs a serious threat after some turns, being able to eat nearly anything. The deck itself is well known and is a typical example of a stall/break hybrid deck, keeping the opponent at bay with cards, while damage builds up for the late game.
The first thing you want is to have an otyugh and a shard of patience out asap (novas help with this), followed if possible by a shard of focus and some turns later a gravity pull on the shard of focus. For most of the game the deck plays as a control deck, with you using your CC and PC to respond to your opponent's threats, while trying to keep a healthy sofo shield to get around damage. After that, use your judgement of when is the best time to release the SoPa. Depending on the opponent you'll have to wait for a one turn kill, but most of the time aiming at two or even three turn kills works better.
Strengths:
With the inclusion of shards in war it was inevitable that Swallow was going to be a big part of it. Regular swallow and its variants do a good job against entropy, life and aether, while doing an okay job against death and light. The main advantage of the deck is being able to stall most creature decks (fractal can give it a bit of trouble but is doable), while also being able to work as a stallbreaker and giving permanent based decks a hard time.
Weaknesses:
As with many gravity based decks, reverse time really hurts this deck. Decks with heavy permanent control are also able to disrupt the strategy by getting rid of Shard of Patience, which limits the overall damage of the deck and which creatures Otyughs can eat. Shard of Freedom rushes are also a tough matchup as they can be fast enough to get around the creature control (evade also reduces the efficiency of the CC). Because of this, in a war setting it is a risky choice against time (RT), darkness (steal), fire (deflagration) and air.
Becoming a War Reporter
Frogtal
One of life's most standard decks. It utilises the efficiency and rush potential of Giant Frog, as well as the rush and stallbreaking potential of Fractal to produce a deck that, once it gets started, is hard to stop.
There is versatility within Frogtal, that which is seen in the support cards. Lightning can be used to provide CC, which this deck lacks as a whole. Silence can be used to lock the opponent down for a turn, potentially changing the game, or winning it. Heal can provide burst sustain, and Jade Staff provides a long term heal, eventually outhealing Heal as a card, as well as providing more damage.
While it is counterable, and there are a few ways to do this, it's overwhelming speed and creature production can make it tough for many other decks to counter. It is a good enough deck, and standard enough deck, that it's favourable matchups are ones which, put simply, cannot stop it.
Cards and decks which counter Frogtal are decks which can deny rushes, like aggressive Stalls, and control decks, and decks which contain powerful AoE spells like Rain of Fire. This is because they can live through the initial burst provided by a rush deck, and in most cases, can control the board to prevent most of the damage dealt by the frogs, ultimately living through Fractal's consistent output of damage.
Frogtal
One of life's most standard decks. It utilises the efficiency and rush potential of Giant Frog, as well as the rush and stallbreaking potential of Fractal to produce a deck that, once it gets started, is hard to stop.
(http://2.bp.blogspot.com/_0WwzN570yg8/SwnkvJ9WvfI/AAAAAAAAC0k/cHeWnYVjKis/s800/runnerfrog_-_fractal_-_tree_frog_embryos.jpg)
There is versatility within Frogtal, that which is seen in the support cards. Lightning can be used to provide CC, which this deck lacks as a whole. Silence can be used to lock the opponent down for a turn, potentially changing the game, or winning it. Heal can provide burst sustain, and Jade Staff provides a long term heal, eventually outhealing Heal as a card, as well as providing more damage.
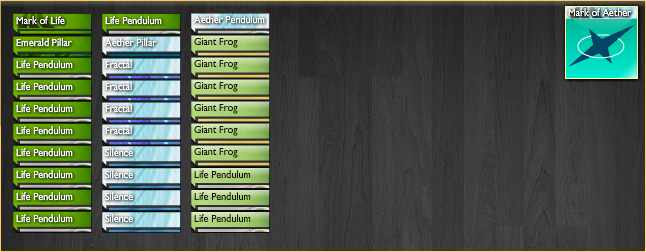
While it is counterable, and there are a few ways to do this, it's overwhelming speed and creature production can make it tough for many other decks to counter. It is a good enough deck, and standard enough deck, that it's favourable matchups are ones which, put simply, cannot stop it.
(http://3.bp.blogspot.com/_0WwzN570yg8/S2XkSvSpYJI/AAAAAAAAC-U/KmtFx8_HU0g/s800/runnerfrog_-_surprise_frog.jpg)
Cards and decks which counter Frogtal are decks which can deny rushes, like aggressive Stalls, and control decks, and decks which contain powerful AoE spells like Rain of Fire. This is because they can live through the initial burst provided by a rush deck, and in most cases, can control the board to prevent most of the damage dealt by the frogs, ultimately living through Fractal's consistent output of damage.
Being a War Reporter
Welcome to a deck spotlight by your friendly neighborhood Water enthusiast, JonathanCrazyJ. This week, we feature a commonly used, extremely effective Water deck.
Serpentine
This particular example was used in War #9, Round 4 (http://elementscommunity.org/forum/round-4-249/(water-salvage)-jonathancrazyj-3-1-ad-tienzustorm-(light-merc)-(treebeard-sub)/). It beat Light's Mercenary, treebeard xiii 3-1. For further examples of use, see the footnotes.
Deck Strategy
This deck is built to cripple the opponent, making it difficult to successfully play any creature, either by control or denial, and slowly whittle away their health with its own solid creatures. Works extremely well against Rush decks, Domination decks and some Combo strategies. The versatility of its shutdown abilities gives it a decent chance against a wide range of decks.
Card By Card
Basilisk Blood: Excellent stalling CC that works against anything that isn't immaterial. 6 turns of stalling is plenty to allow you time for the tide of battle to turn your way.
Poseidon: If you can get this out on turn 1 or 2, it can single handedly cripple your opponents quanta sources, giving you plenty of time to chip away at their health. It is important to upgrade these first, because costing 2 :earth per use is vastly superior to the 3 :earth needed for the unupgraded Trident.
Toadfish, Abyss Crawler, Arctic Dragon: All strong, high attack creatures that fill out your creature slots efficiently. Varied, because Toadfish and Arctic Dragon can get through Gravity Shields; Arctic Dragons can get through Wings, and Abyss Crawlers have a highly efficient quanta to damage ratio.
Other Options
Purify: If you are worried about Shard of Sacrifice or Poison strategies, one or two of these can be splashed.
Arctic Squid: Usually overkill, but splashing a few of these can cut any chance your opponent has of recovering from your early CC.
Nymph Tears: Two of these, or Nymph Queens, can allow you a chance against some stall decks that would usually dominate you.
Previous Use
War #8, Round 5 (http://elementscommunity.org/forum/round-5-170/(death-sld-)-tiko-3-1-(water-sld-)-(sub)-malignant/msg1168106/#msg1168106): Unlucky to lose through bad draws vs. Death.
War #9, Round 6 (http://elementscommunity.org/forum/round-6/(time-gen-)-spikespiegel-3-0-basman-1453-(water-sld-ups)/msg1213771/#msg1213771): Lost against a Creatureless counter.
Welcome to a deck spotlight by your friendly neighborhood Water enthusiast, JonathanCrazyJ. This week, we feature a commonly used, extremely effective Water deck.
Serpentine
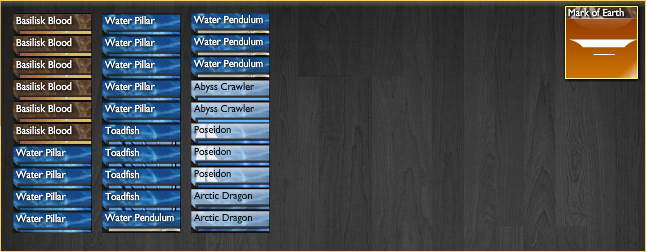
This particular example was used in War #9, Round 4 (http://elementscommunity.org/forum/round-4-249/(water-salvage)-jonathancrazyj-3-1-ad-tienzustorm-(light-merc)-(treebeard-sub)/). It beat Light's Mercenary, treebeard xiii 3-1. For further examples of use, see the footnotes.
Deck Strategy
This deck is built to cripple the opponent, making it difficult to successfully play any creature, either by control or denial, and slowly whittle away their health with its own solid creatures. Works extremely well against Rush decks, Domination decks and some Combo strategies. The versatility of its shutdown abilities gives it a decent chance against a wide range of decks.
Card By Card
Basilisk Blood: Excellent stalling CC that works against anything that isn't immaterial. 6 turns of stalling is plenty to allow you time for the tide of battle to turn your way.
Poseidon: If you can get this out on turn 1 or 2, it can single handedly cripple your opponents quanta sources, giving you plenty of time to chip away at their health. It is important to upgrade these first, because costing 2 :earth per use is vastly superior to the 3 :earth needed for the unupgraded Trident.
Toadfish, Abyss Crawler, Arctic Dragon: All strong, high attack creatures that fill out your creature slots efficiently. Varied, because Toadfish and Arctic Dragon can get through Gravity Shields; Arctic Dragons can get through Wings, and Abyss Crawlers have a highly efficient quanta to damage ratio.
Other Options
Purify: If you are worried about Shard of Sacrifice or Poison strategies, one or two of these can be splashed.
Arctic Squid: Usually overkill, but splashing a few of these can cut any chance your opponent has of recovering from your early CC.
Nymph Tears: Two of these, or Nymph Queens, can allow you a chance against some stall decks that would usually dominate you.
Previous Use
War #8, Round 5 (http://elementscommunity.org/forum/round-5-170/(death-sld-)-tiko-3-1-(water-sld-)-(sub)-malignant/msg1168106/#msg1168106): Unlucky to lose through bad draws vs. Death.
War #9, Round 6 (http://elementscommunity.org/forum/round-6/(time-gen-)-spikespiegel-3-0-basman-1453-(water-sld-ups)/msg1213771/#msg1213771): Lost against a Creatureless counter.
Post by: rob77dp on June 01, 2016, 03:53:14 pm